Photographic Instructions for Diagonal Weaving

Click here for step by step instructions

by Anne Grassham, Fleecewood Woolcraft Ltd
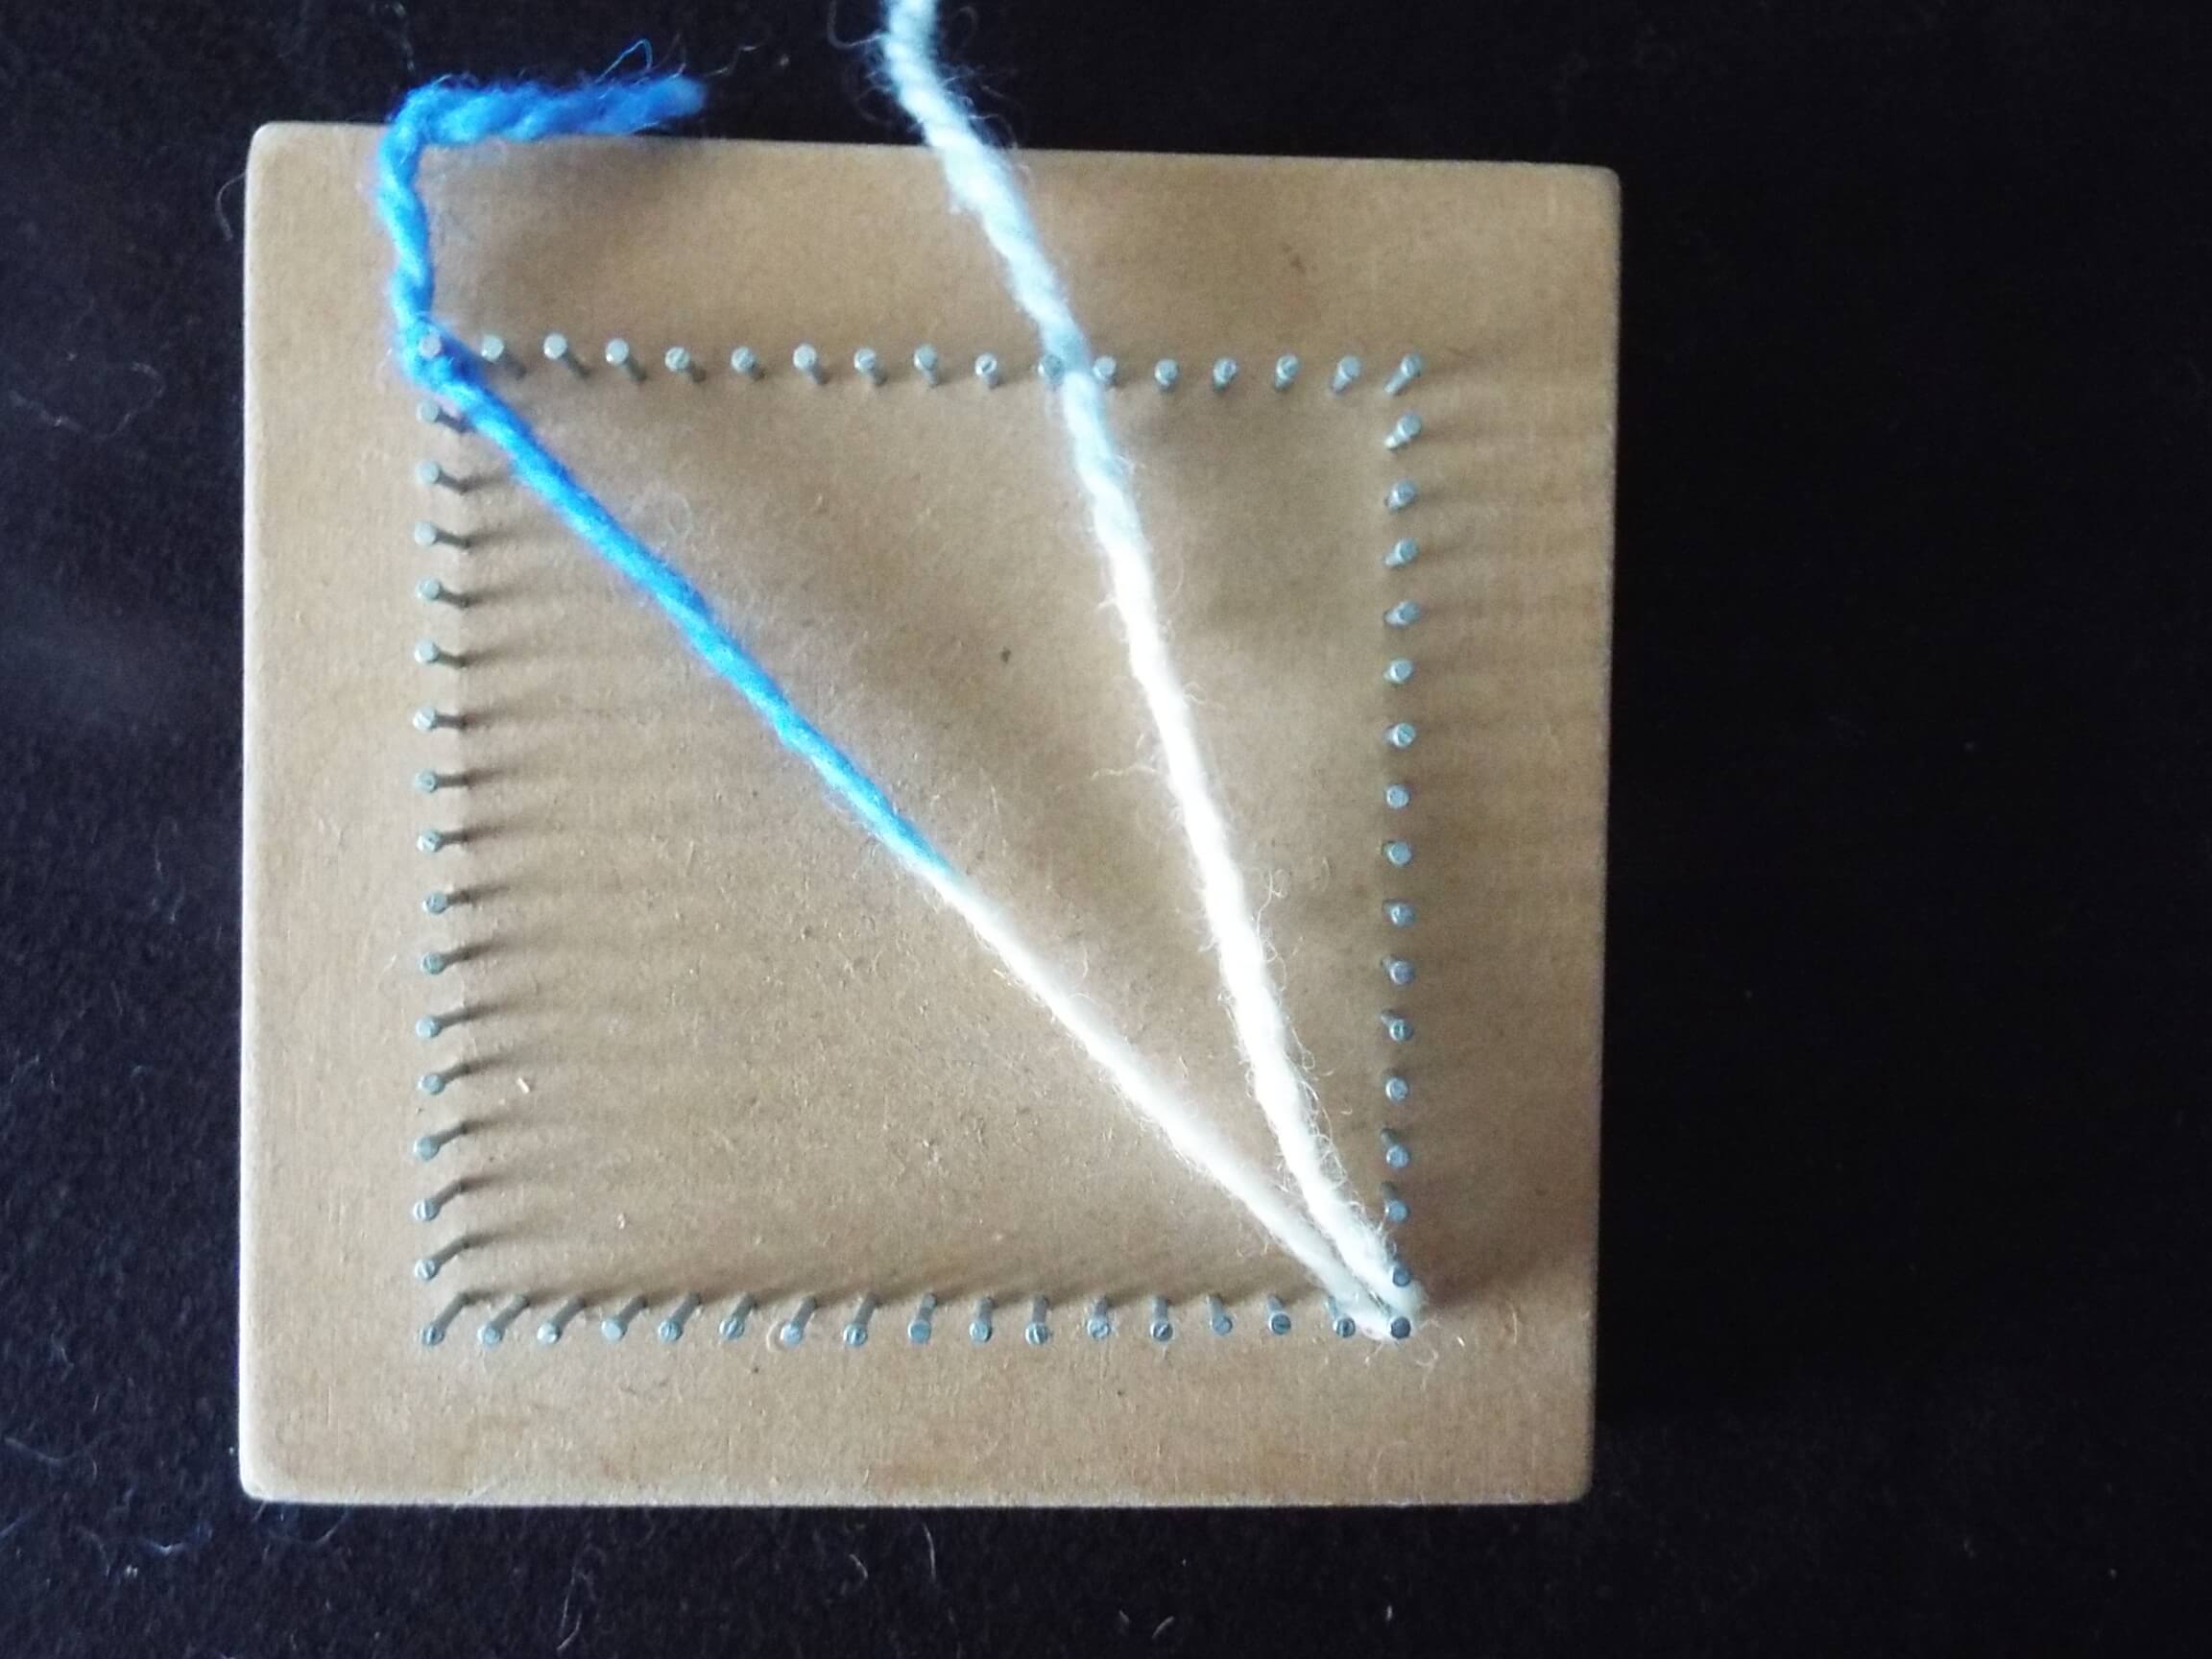 1. Tie yarn to corner nail. Then take yarn diagonally across board and around diagonally opposite nail. Do not wind the yarn right around the nail. The nail is simply to hold the yarn in position. Yarn tension should be firm, and this tension should be maintained throughout subsequent weaving.

Then pull a loop of the yarn under the first diagonal thread. This is the beginning of the weaving process.
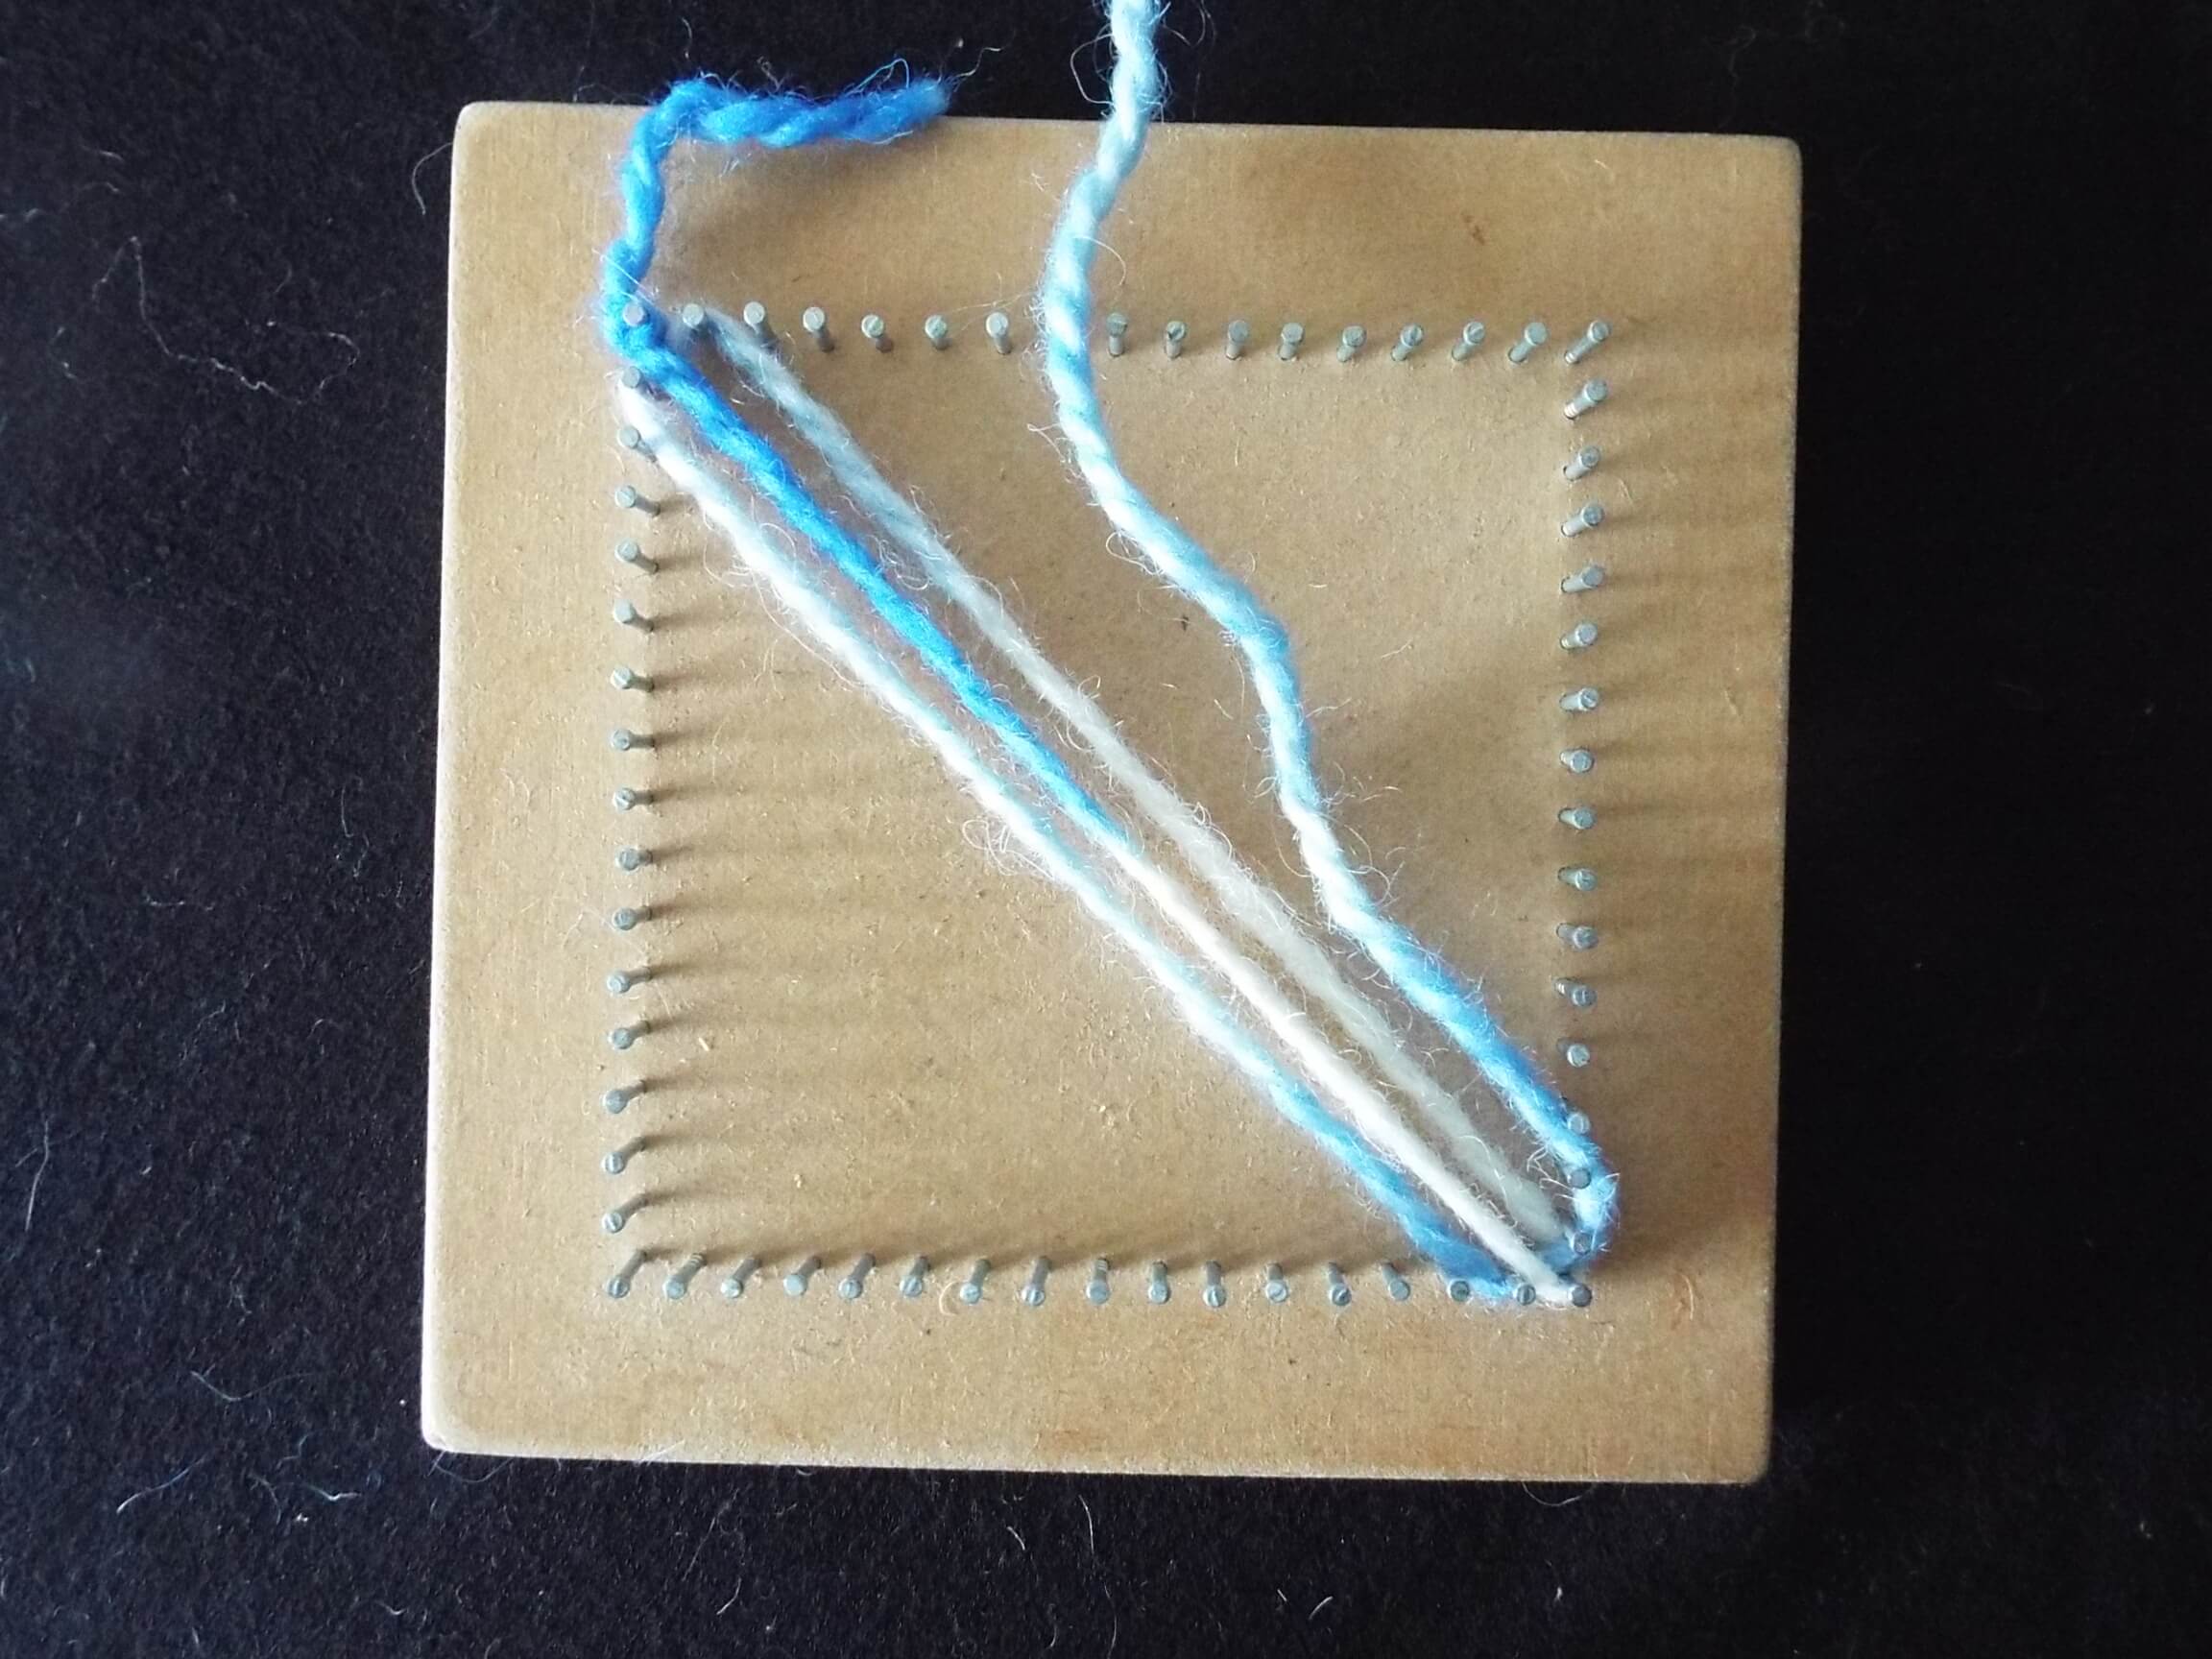
3. Place the woven loop around the nails to the left of the first diagonal thread at top and bottom of board. Pull yarn loop firm, but not tight. Note that because it was a loop that has been woven, weaving occurs at both ends of the board.


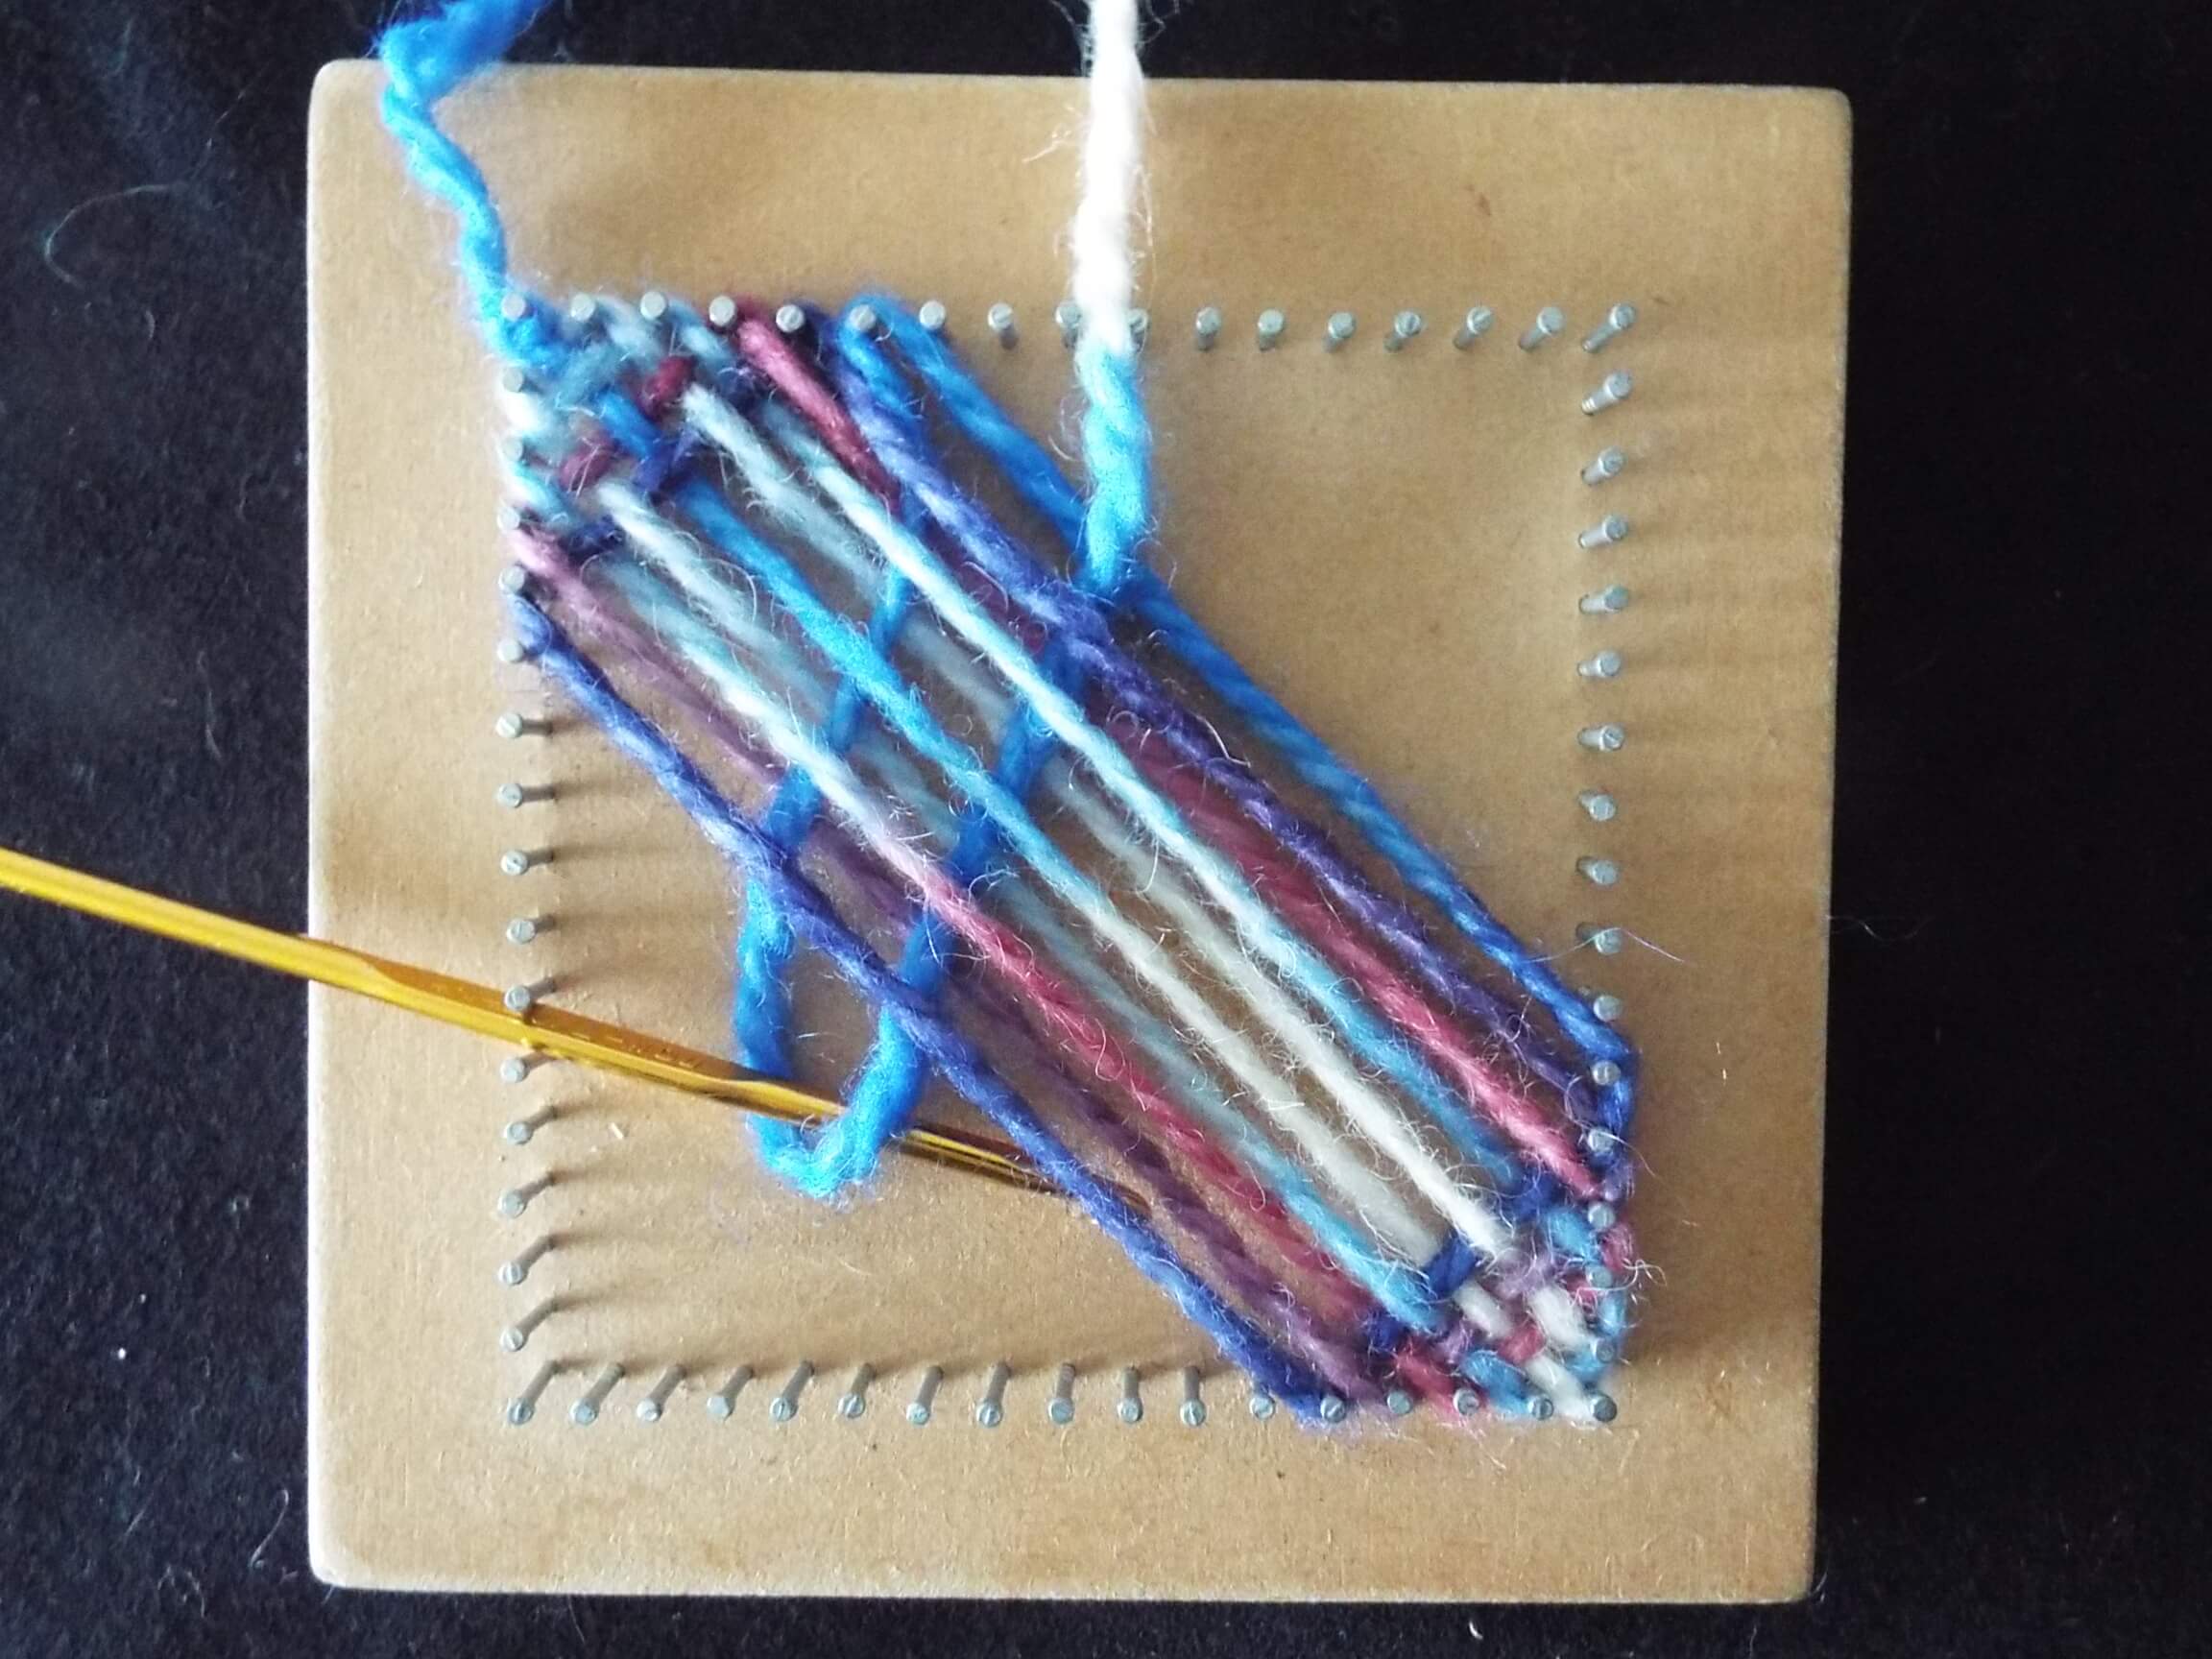 7. Pull yarn loop under several diagonal threads at the same time using a crochet hook to speed the weaving process.
 8. Place yarn loop around appropriate nails and pull firm, remembering to press the threads into straight lines between the nails. If weaving with thicker yarns, this is particularly important, as it can be very much harder to do once the weaving has progressed past half way.
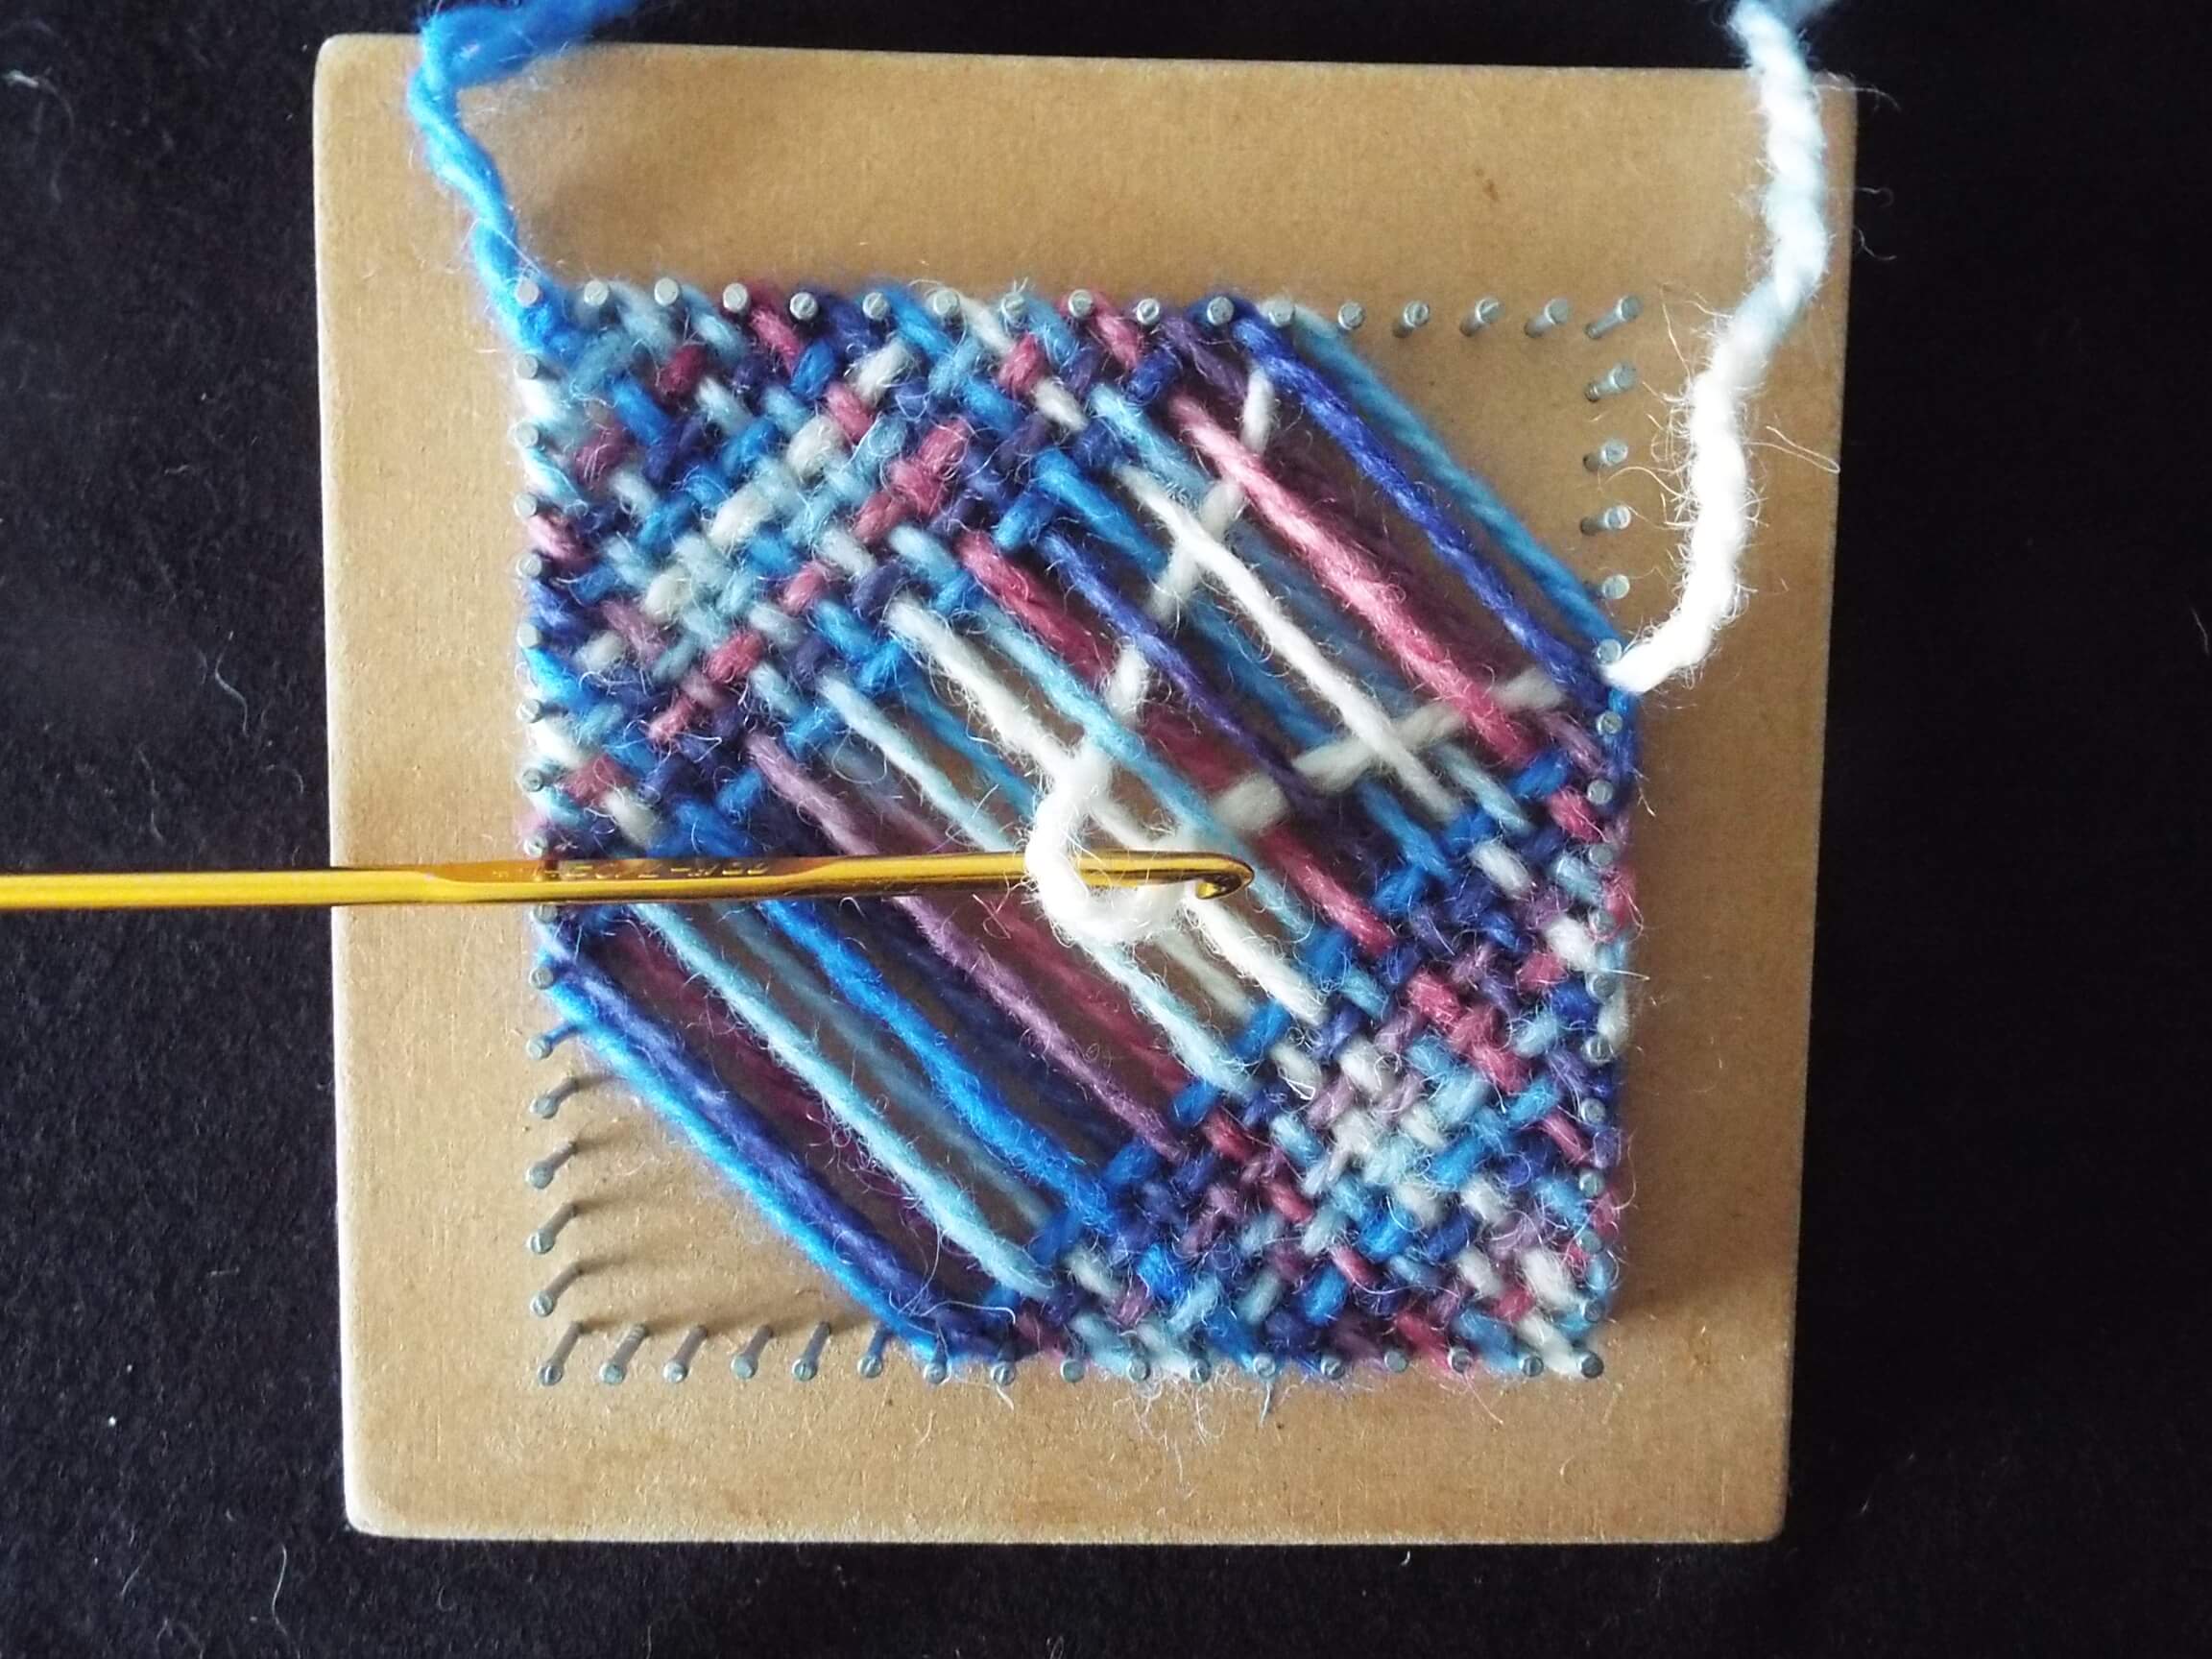 9. As weaving progresses, it can become difficult to weave loops in one go, so insert the crochet hook part way through the path of the loop, and pull through approximately the full size loop, then insert the crochet hook further across the work to finish the weaving the whole loop. Some people like to use a hook with a long shaft so the loop can be woven in one go, but I find the staged process easier.
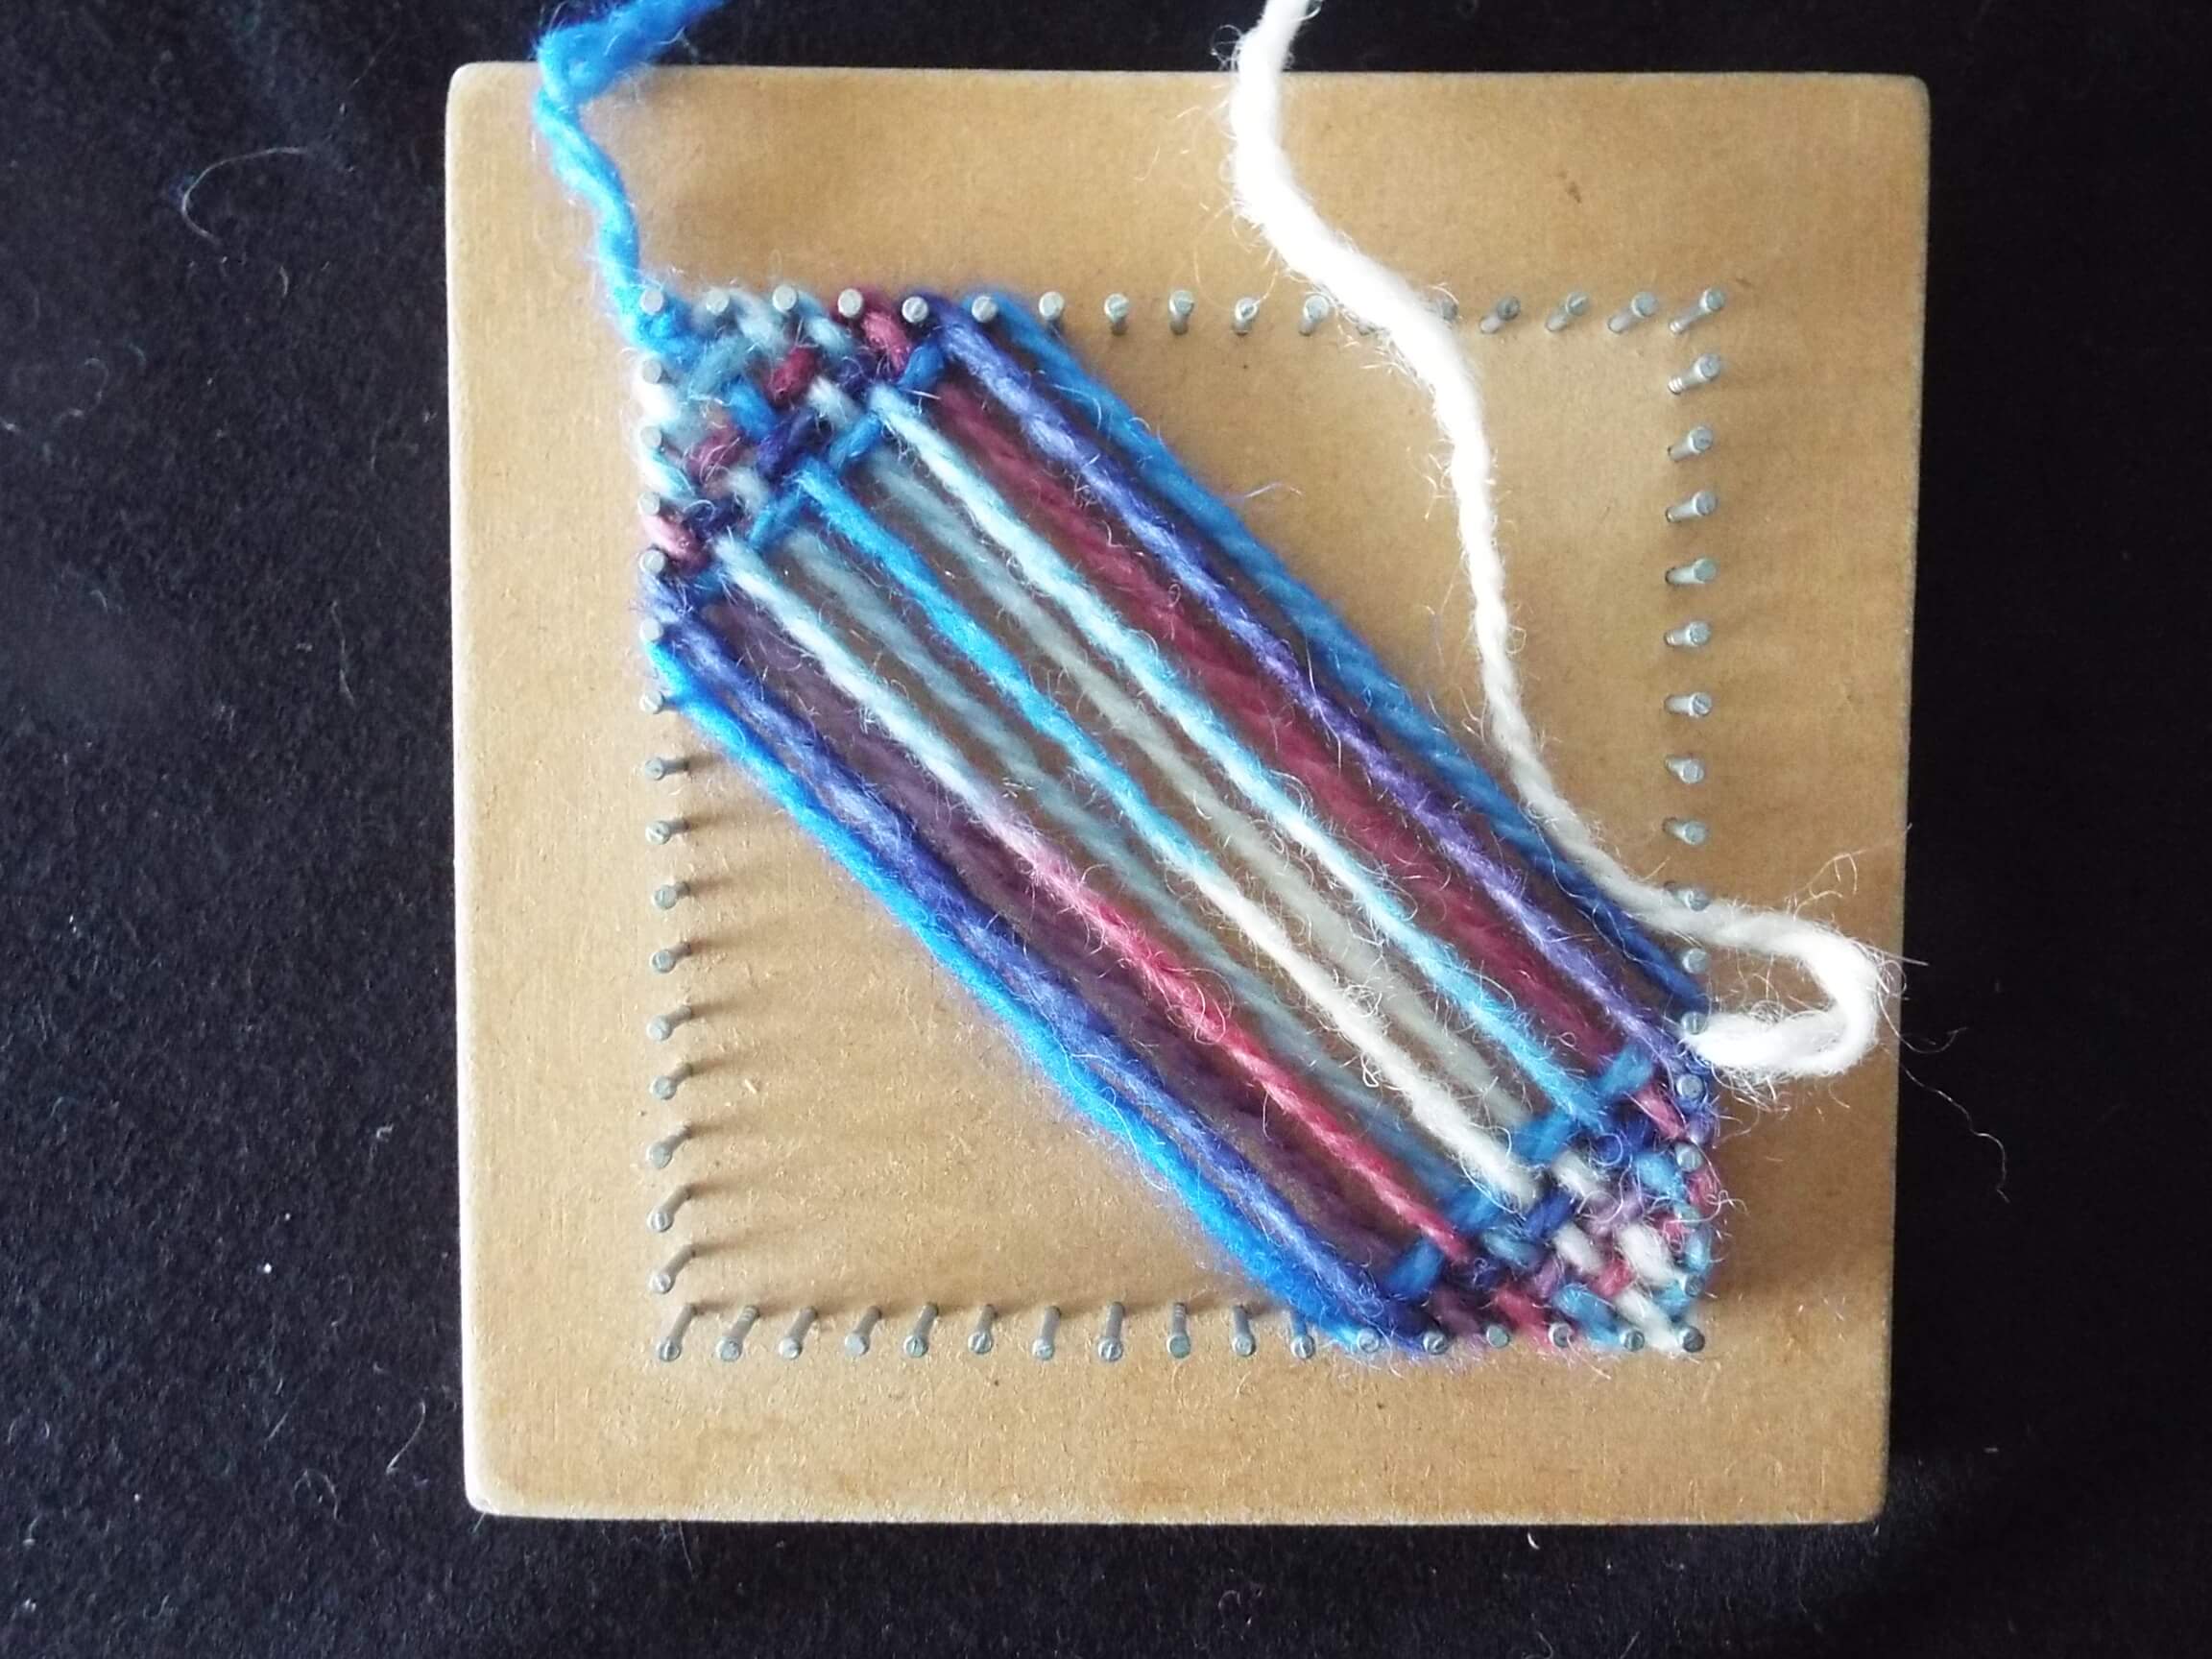
10. Continue weaving until there are only two, diagonally opposite, nails left unused.
Lay the yarn diagonally across the board and add about 4 cm for a tail. Cut the yarn at that point.
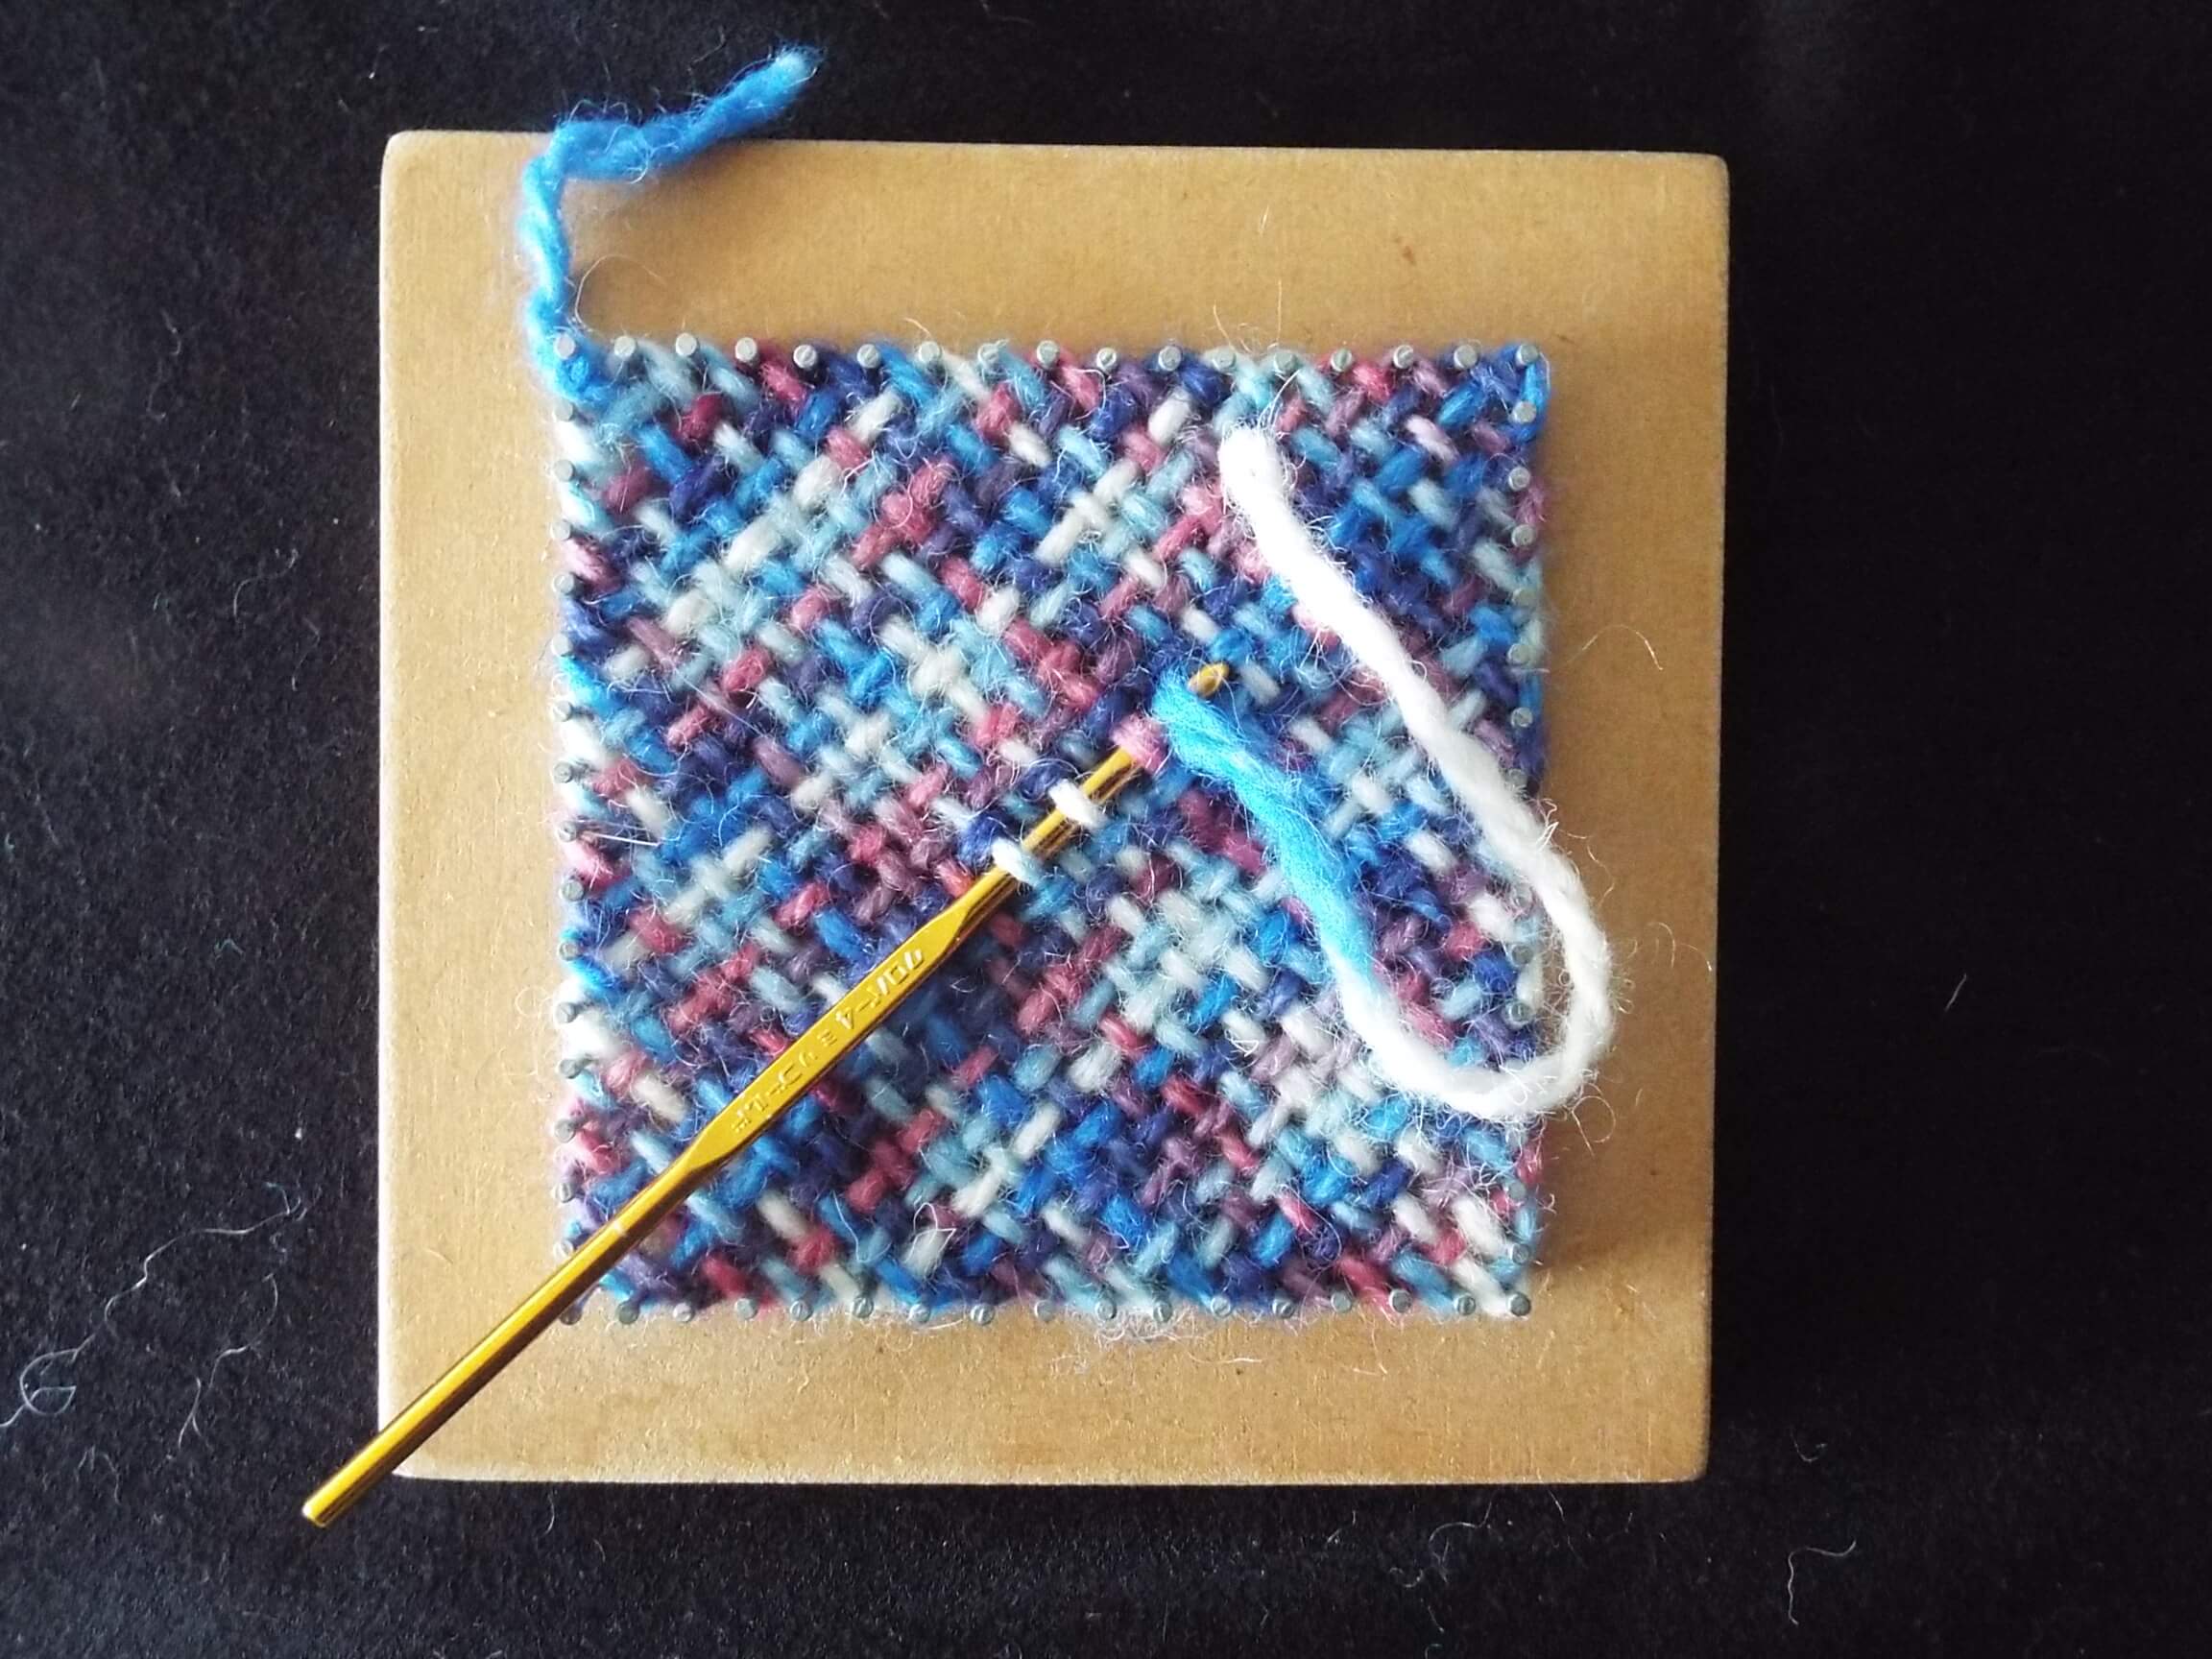 11. Weave the final diagonal thread – not a loop – which will probably need to be done in several stages. The final thread may be harder to weave than previous loops, and if so use the crochet hook to weave under every alternate threat one at a time.
 12. The final diagonal thread locks all the other loops in place, and completes the weaving of the square.
Untie the knot at the start of the weaving so the weaving can be easily lifted off the board using the method in step 13.

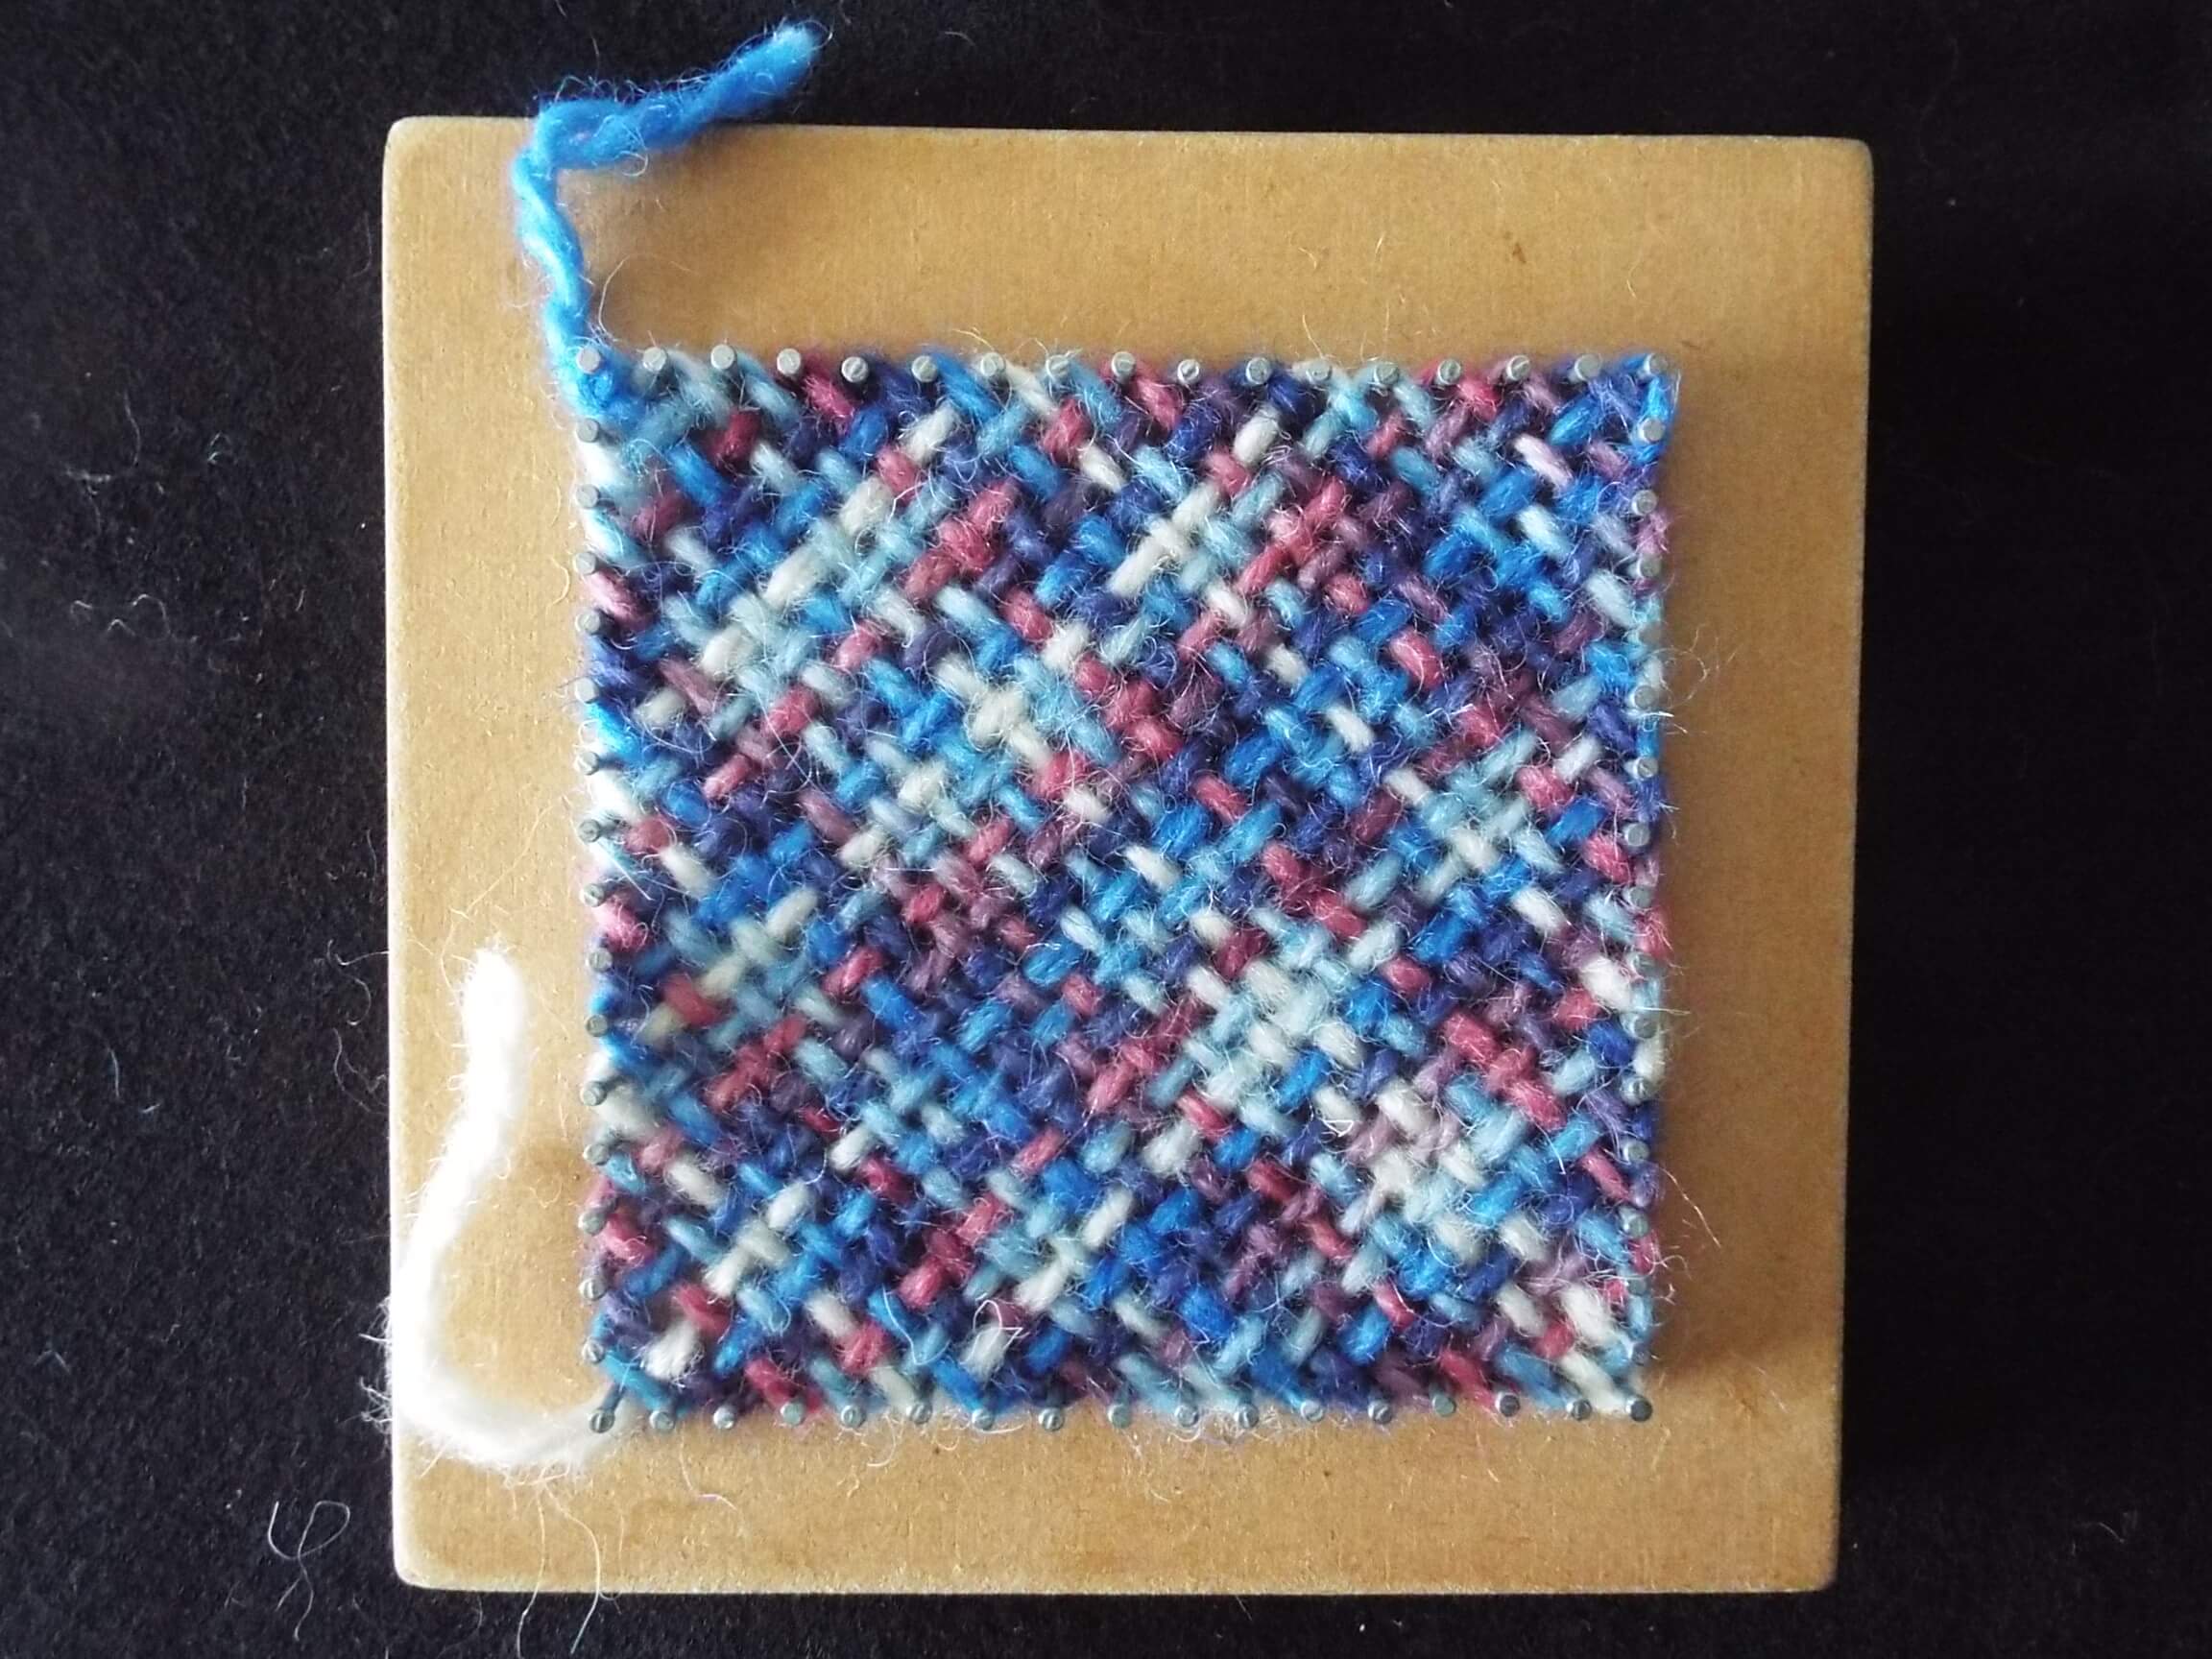
 14. The weaving has four finished edges, and a starting and finishing tail of yarn.
Use the crochet hook to weave in the yarn ends.
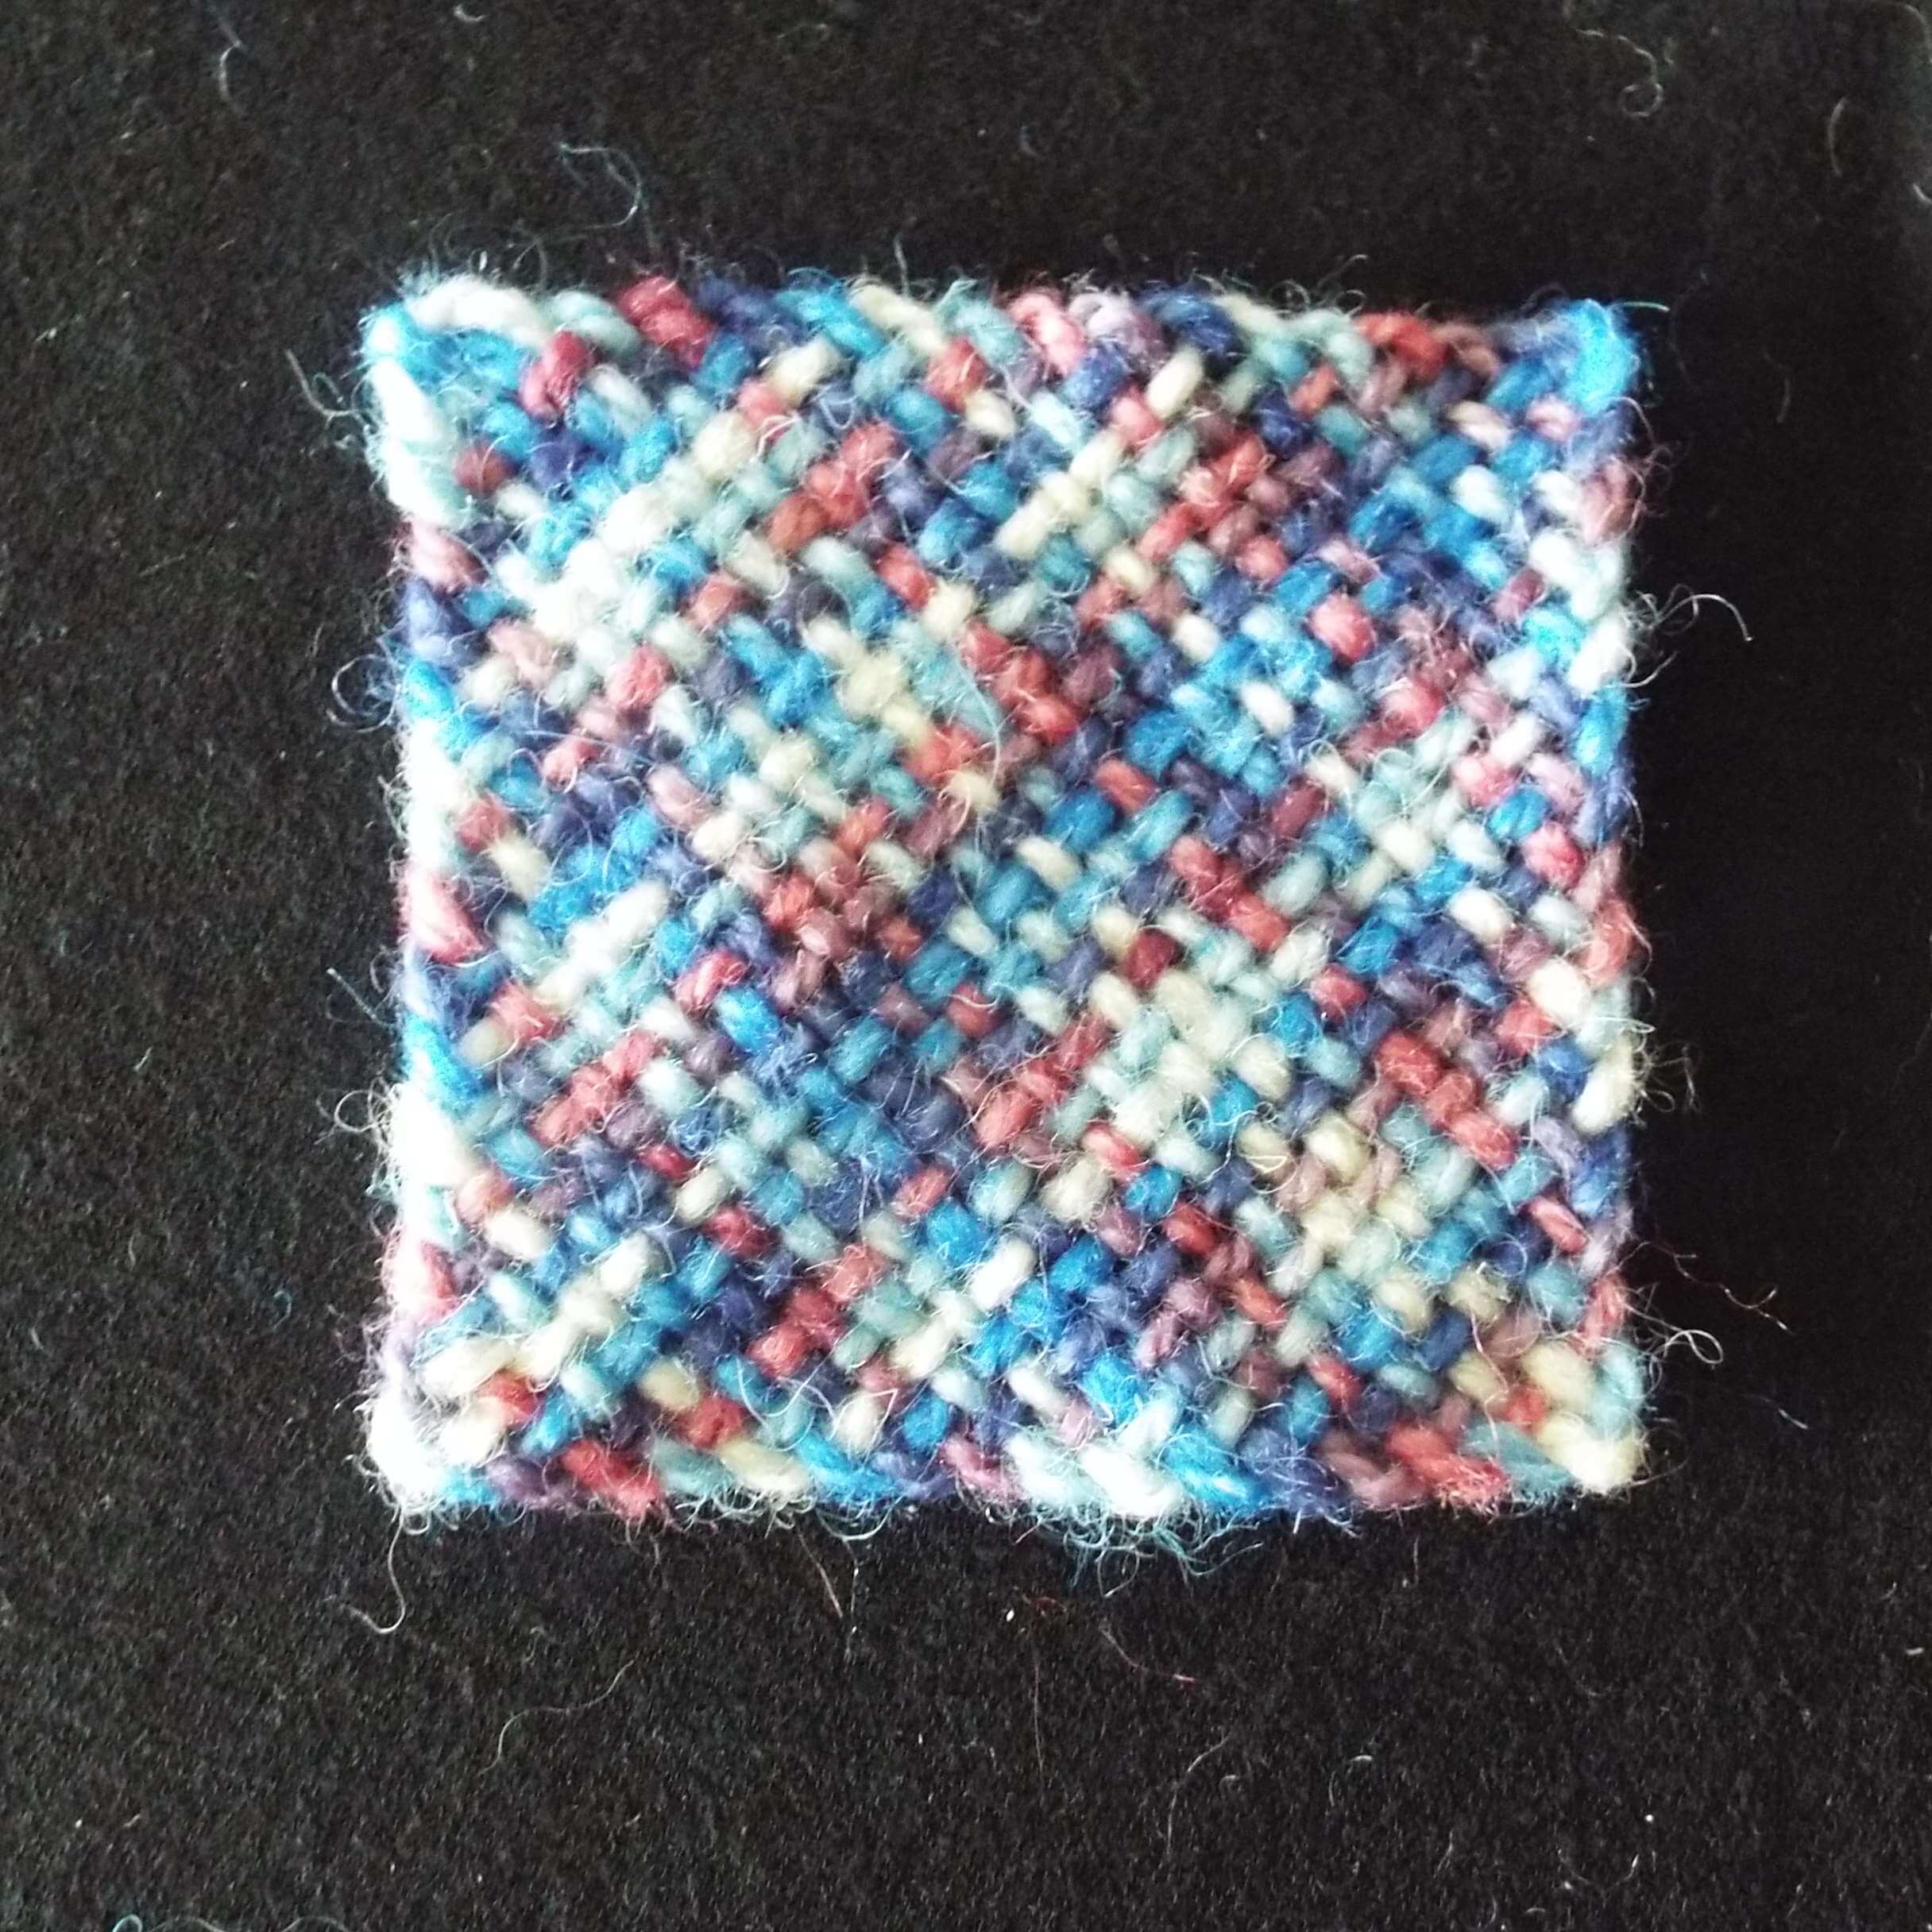 15. The finished diagonally woven square.
Use as a mat or join squares to make a larger piece of fabric.
Anne Grassham
Fleecewood
anne@woolcraft.co.nz
www.woolcraft.co.nz
www.woolcraftworkshops.co.nz
I frequently field questions about how to wash a fleece. Here is what I do.
I use my top loading washing machine, because of the ease of using the spin cycle to remove excess water at each stage of the process. However, you can use a tub or bath. If you do not have access to a spin cycle gently press excess water out, but do not wring the wool.
Always remove wool from the machine while filling with water.
Never agitate or tumble wool, unless you are wanting to make felt.
Water temperature. It is important to use hot water to dissolve the grease. Such hot water is not necessary during rinsing stages, but my rule of thumb is never put the wool into water colder than the wool is, because this will encourage the felting process.
Step 1
Place fleece loosely in open meshed bags (I use onion sacks). I use at least two bags so that I can balance the washing machine on the spin cycle.
Step 2
Soak in cold water (typically overnight) so wool is well wetted and dirt is loosened. This water is excellent for watering plants if you want to bail it out. Drain, spin and remove wool bags.
Step 3
Fill machine with hot water and add detergent or well dissolved soap flakes. I have used fancy wool detergents and find them useful for fleeces with a high wax component in the grease (such as Merino) and dirty fleeces. However, they are not necessary for most of my fleeces, and I typically use much cheaper dish washing liquid – about a cupful. Place the wool bags in the soapy water and gently prod to ensure unimpeded penetration of the water to the center of the bags. (This is why the wool should be loose in the bags). Soak about 15 minutes. Do not let the water cool too much, because dissolved grease and dirt can start depositing back onto the wool. Drain, spin and remove bags.
Without removing the wool from the bags, check it especially a few of the tips. If the fleece is particularly dirty or greasy step 3 may need to be repeated.
Step 4
Fill the machine with hot water, add the wool bags, gently prod to ensure good water penetration to the center of the bags and soak for a few minutes. Drain, spin and remove wool bags.
Repeat step 4 at least twice, and more if necessary, until rinse water is clear. Thorough rinsing is important to get a nice clean fleece. But also be on the look out for incipient felting. It would be better to work with a less clean fleece than ruin it altogether.
Step 5
When fleece is rinsed, gently remove it from the bags and spread out to dry. Drying is most effective if air can circulate through from underneath. I typically spread the wet wool on lengths of curtain net laid out on my slatted sundeck. If it looks like rain I just roll up the wool in the net and bring inside. Later, it is easy to take outside again, and unroll to continue drying.
