Photographic Instructions for Diagonal Weaving

Click here for step by step instructions

by Anne Grassham, Fleecewood Woolcraft Ltd
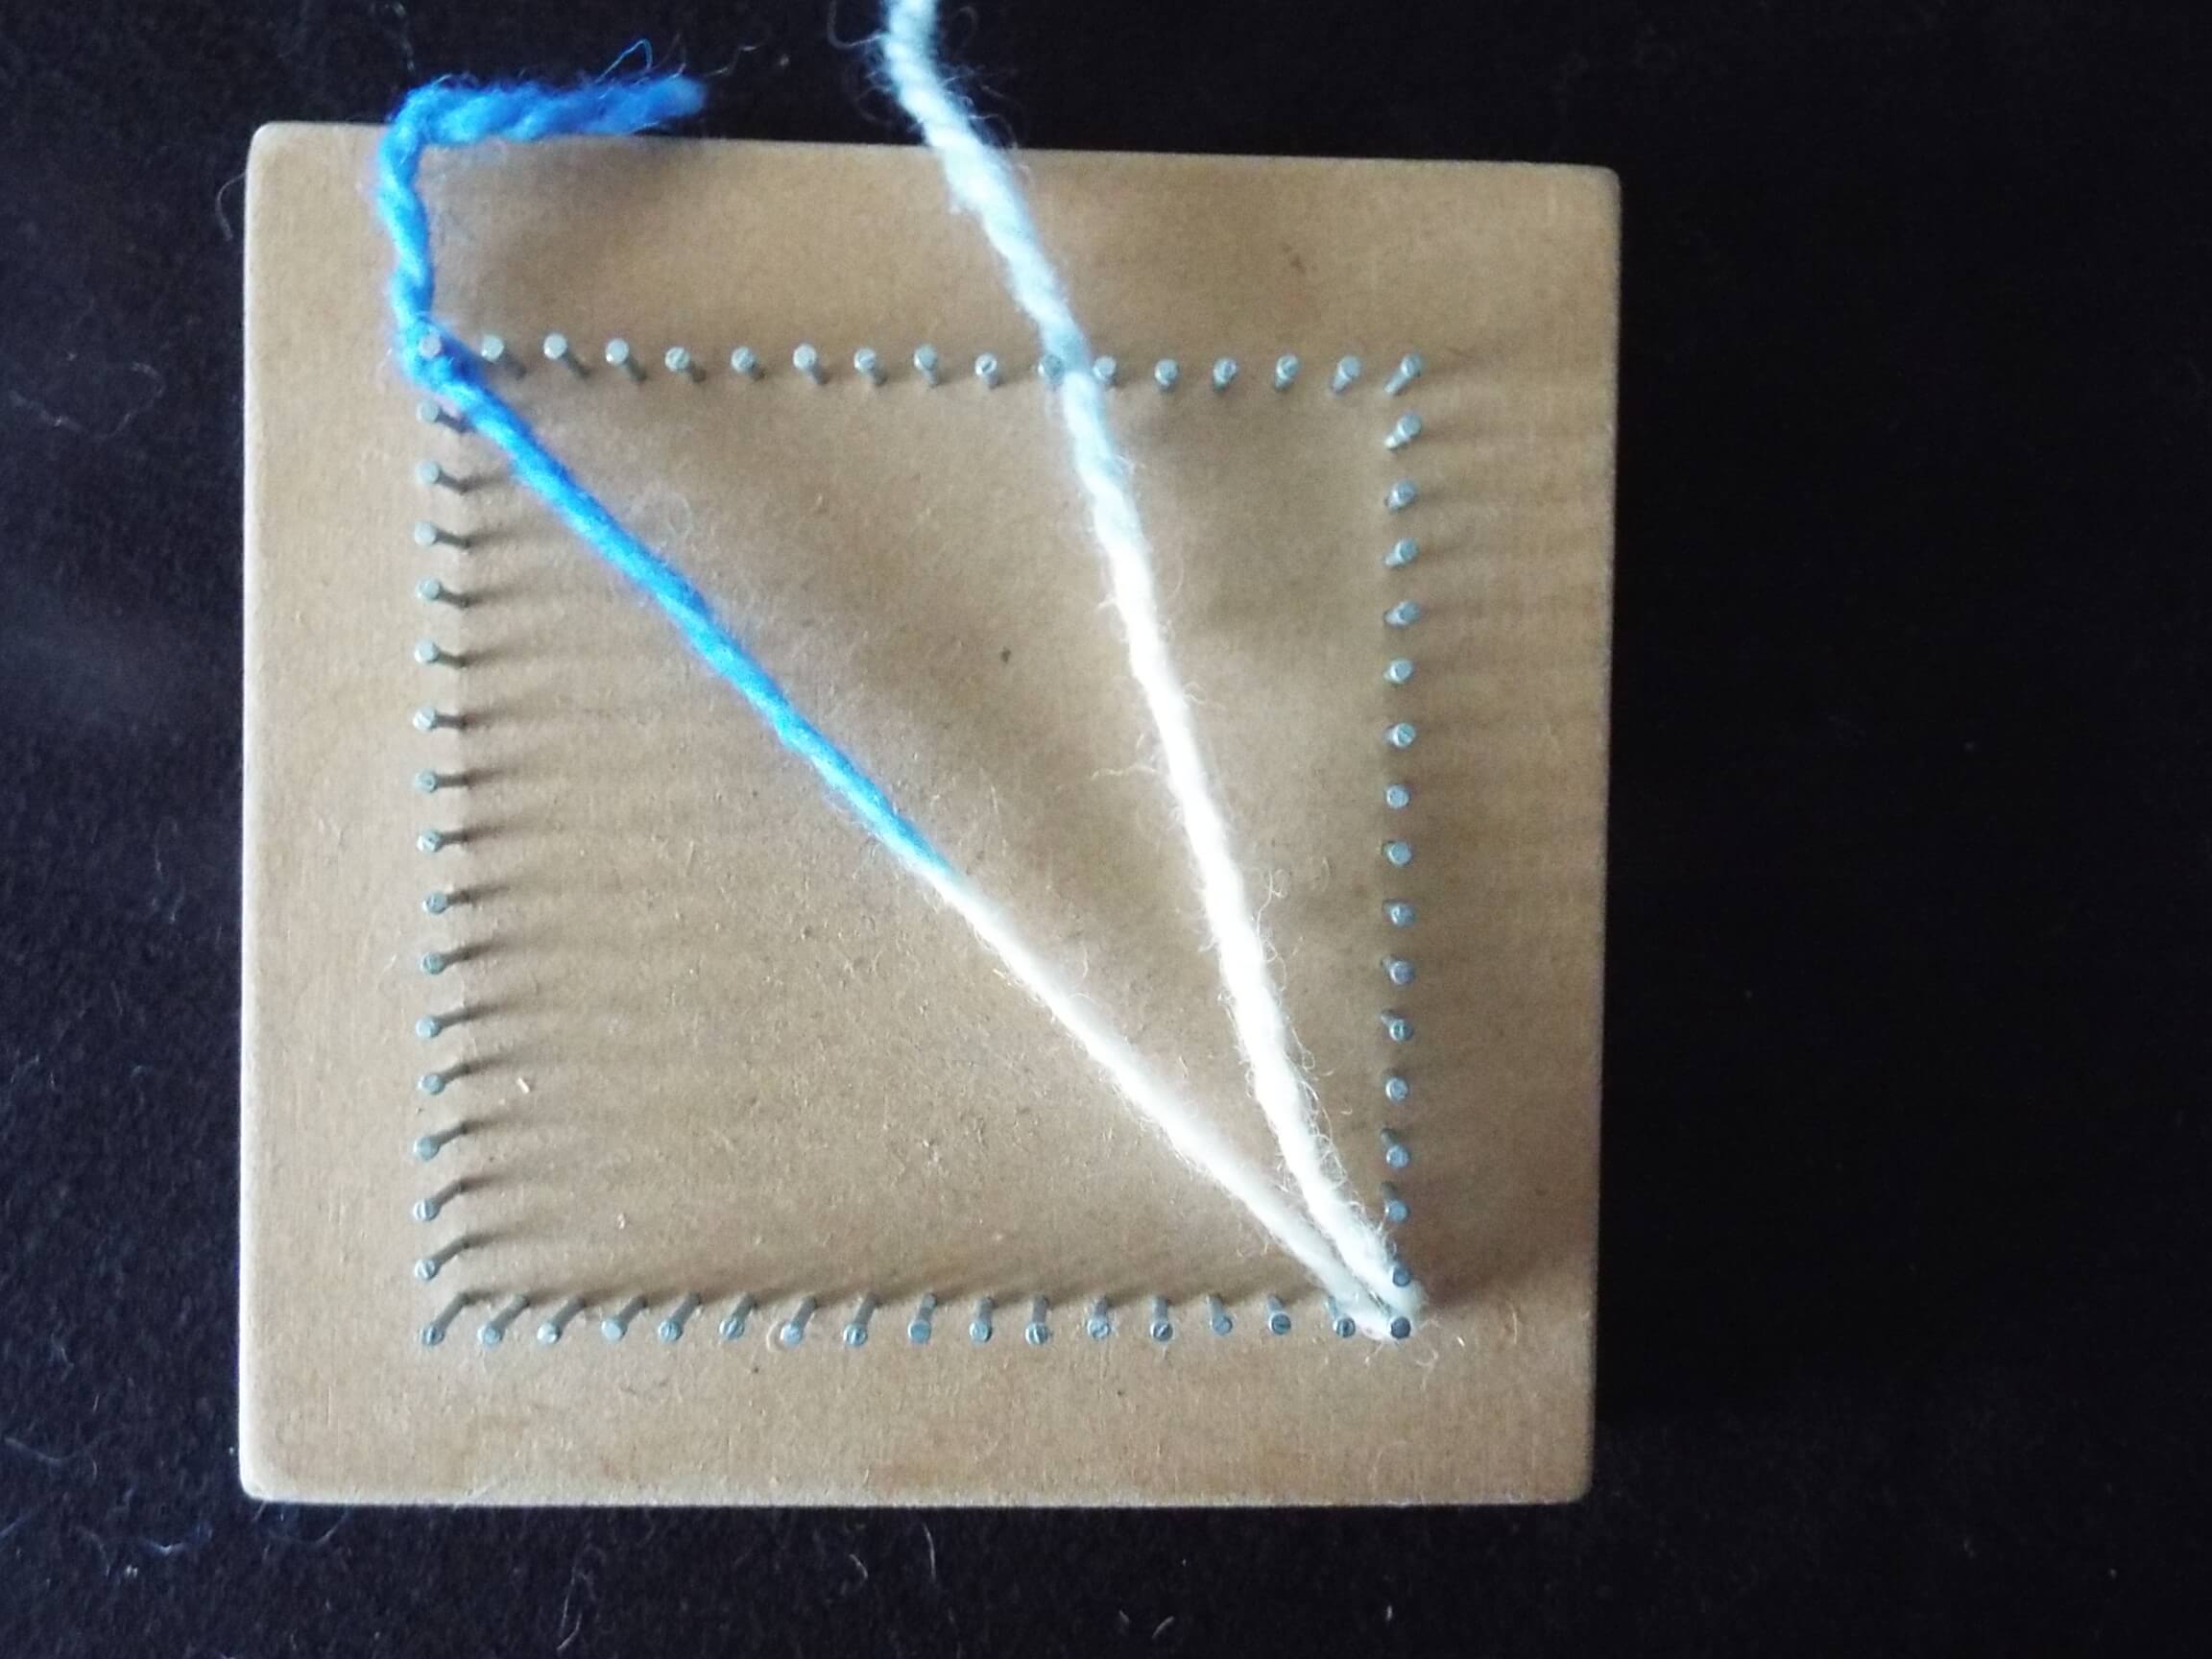 1. Tie yarn to corner nail. Then take yarn diagonally across board and around diagonally opposite nail. Do not wind the yarn right around the nail. The nail is simply to hold the yarn in position. Yarn tension should be firm, and this tension should be maintained throughout subsequent weaving.

Then pull a loop of the yarn under the first diagonal thread. This is the beginning of the weaving process.
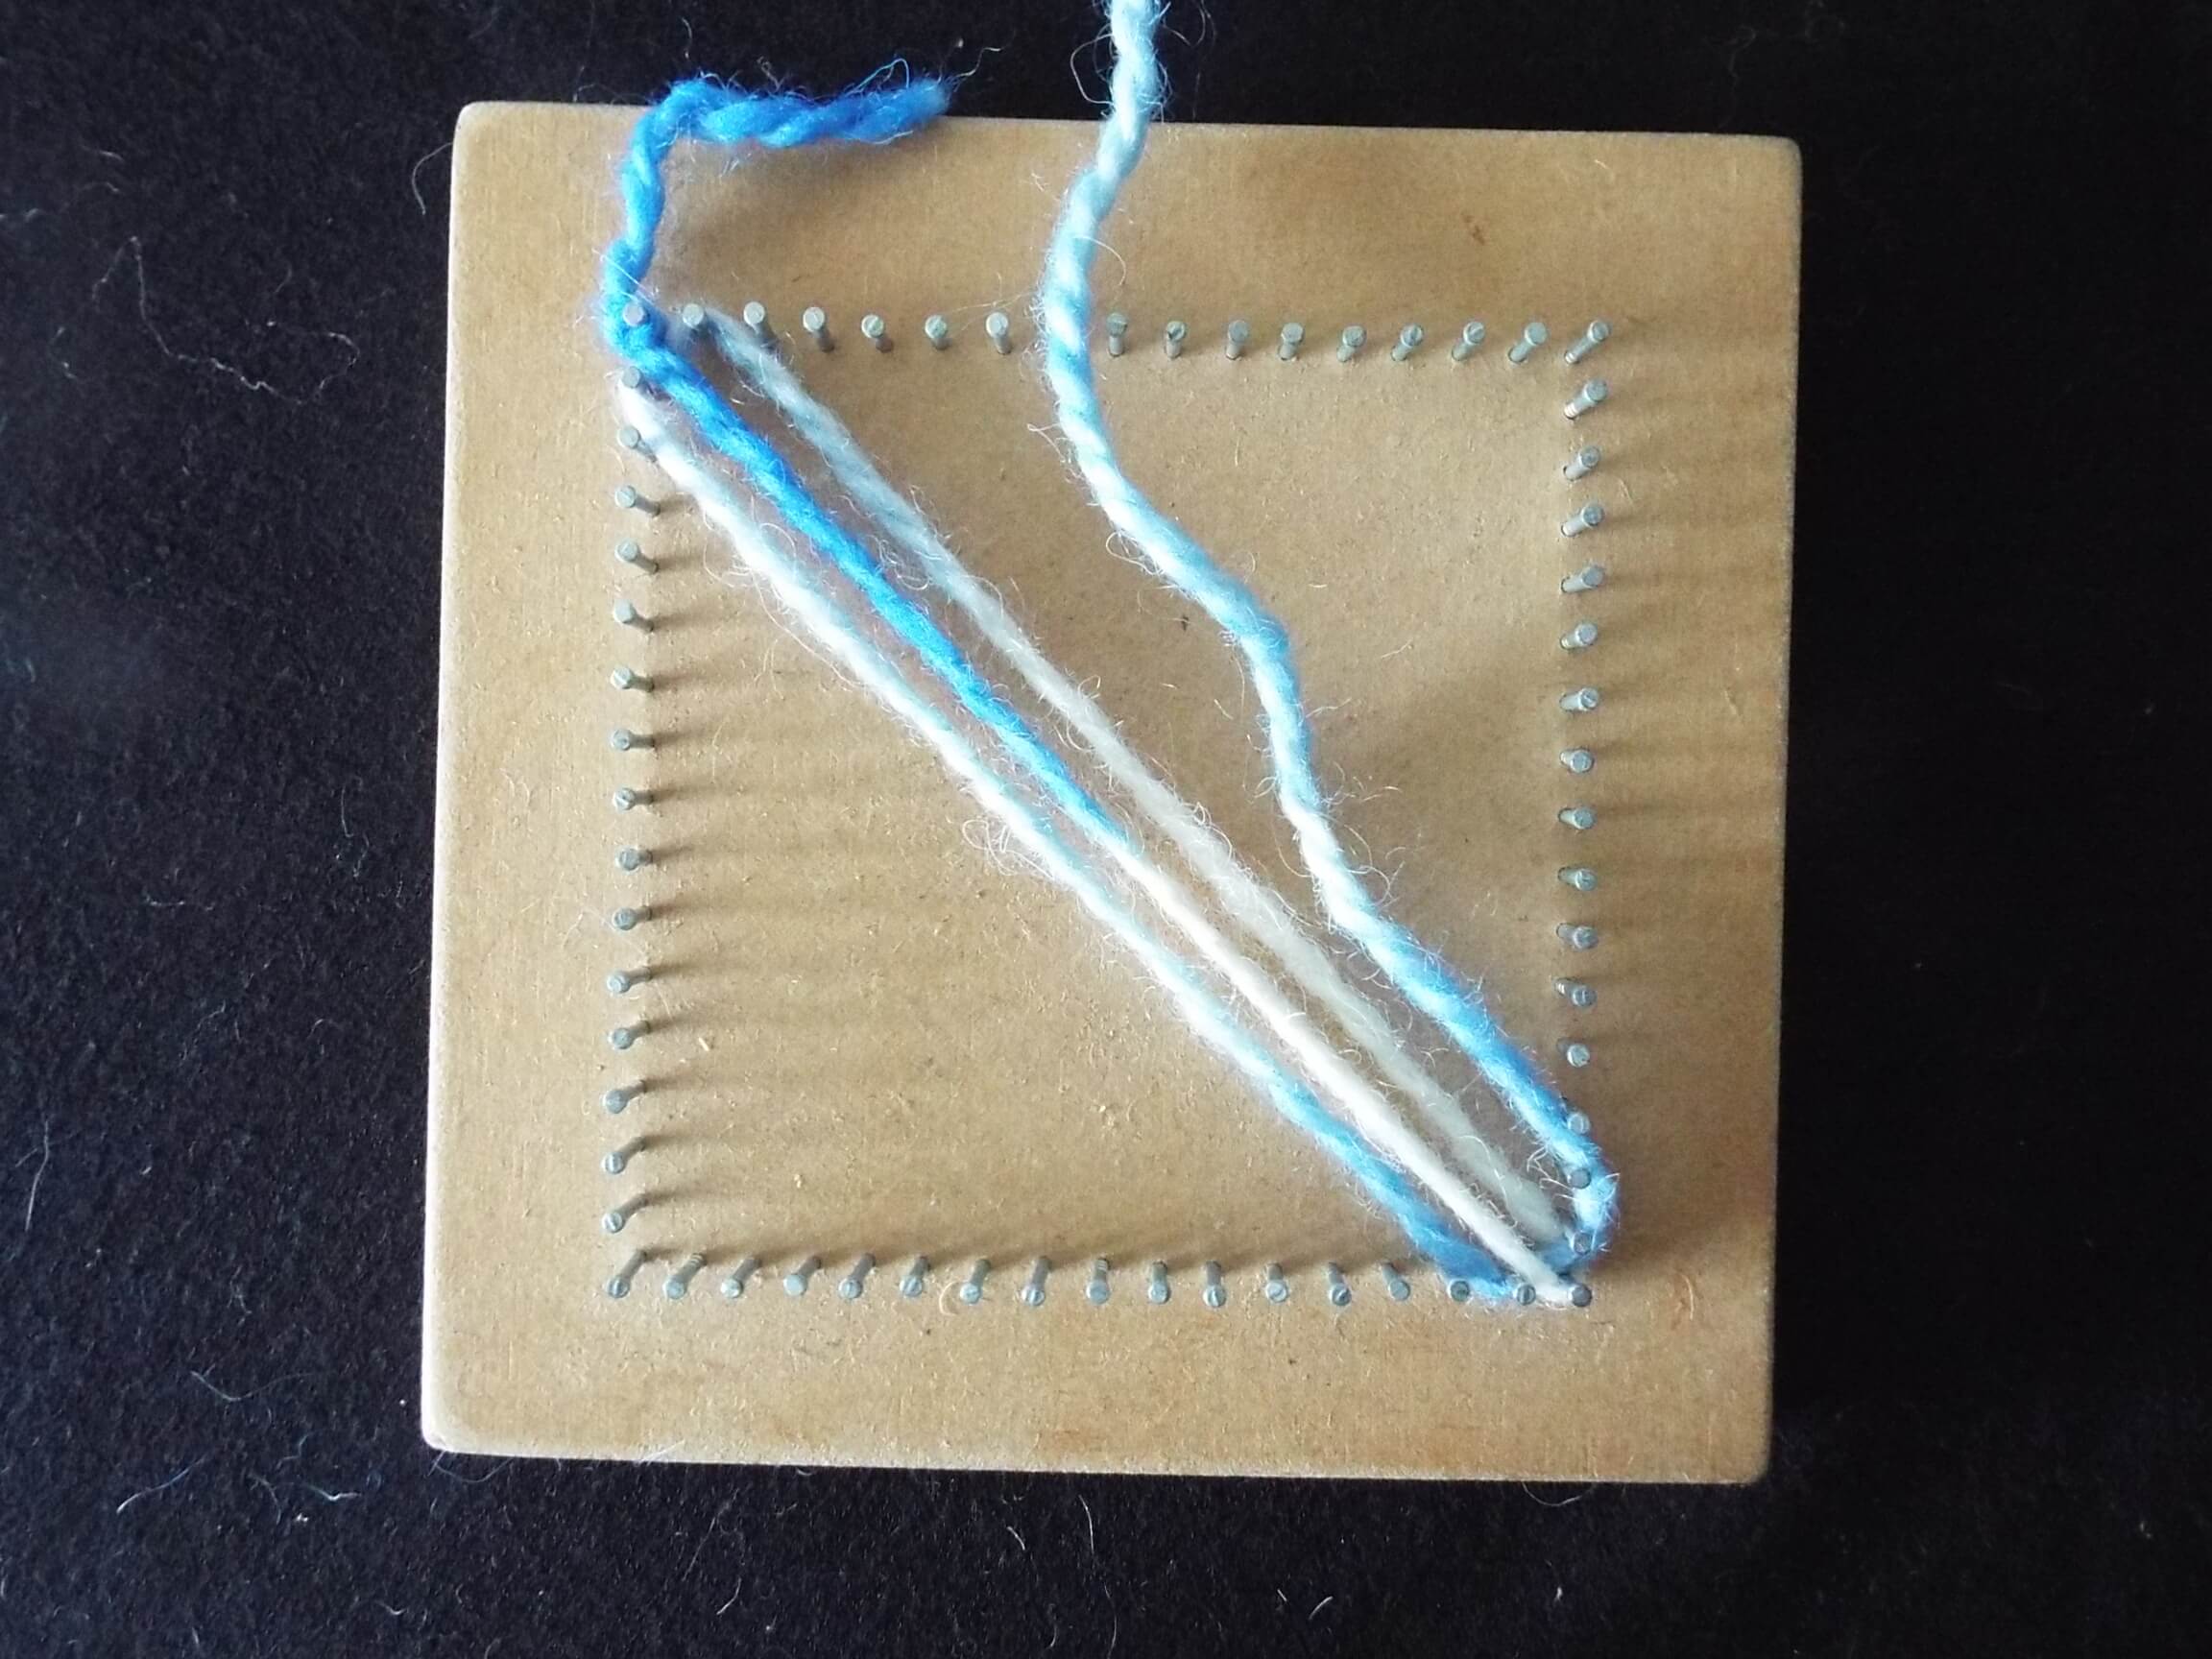
3. Place the woven loop around the nails to the left of the first diagonal thread at top and bottom of board. Pull yarn loop firm, but not tight. Note that because it was a loop that has been woven, weaving occurs at both ends of the board.


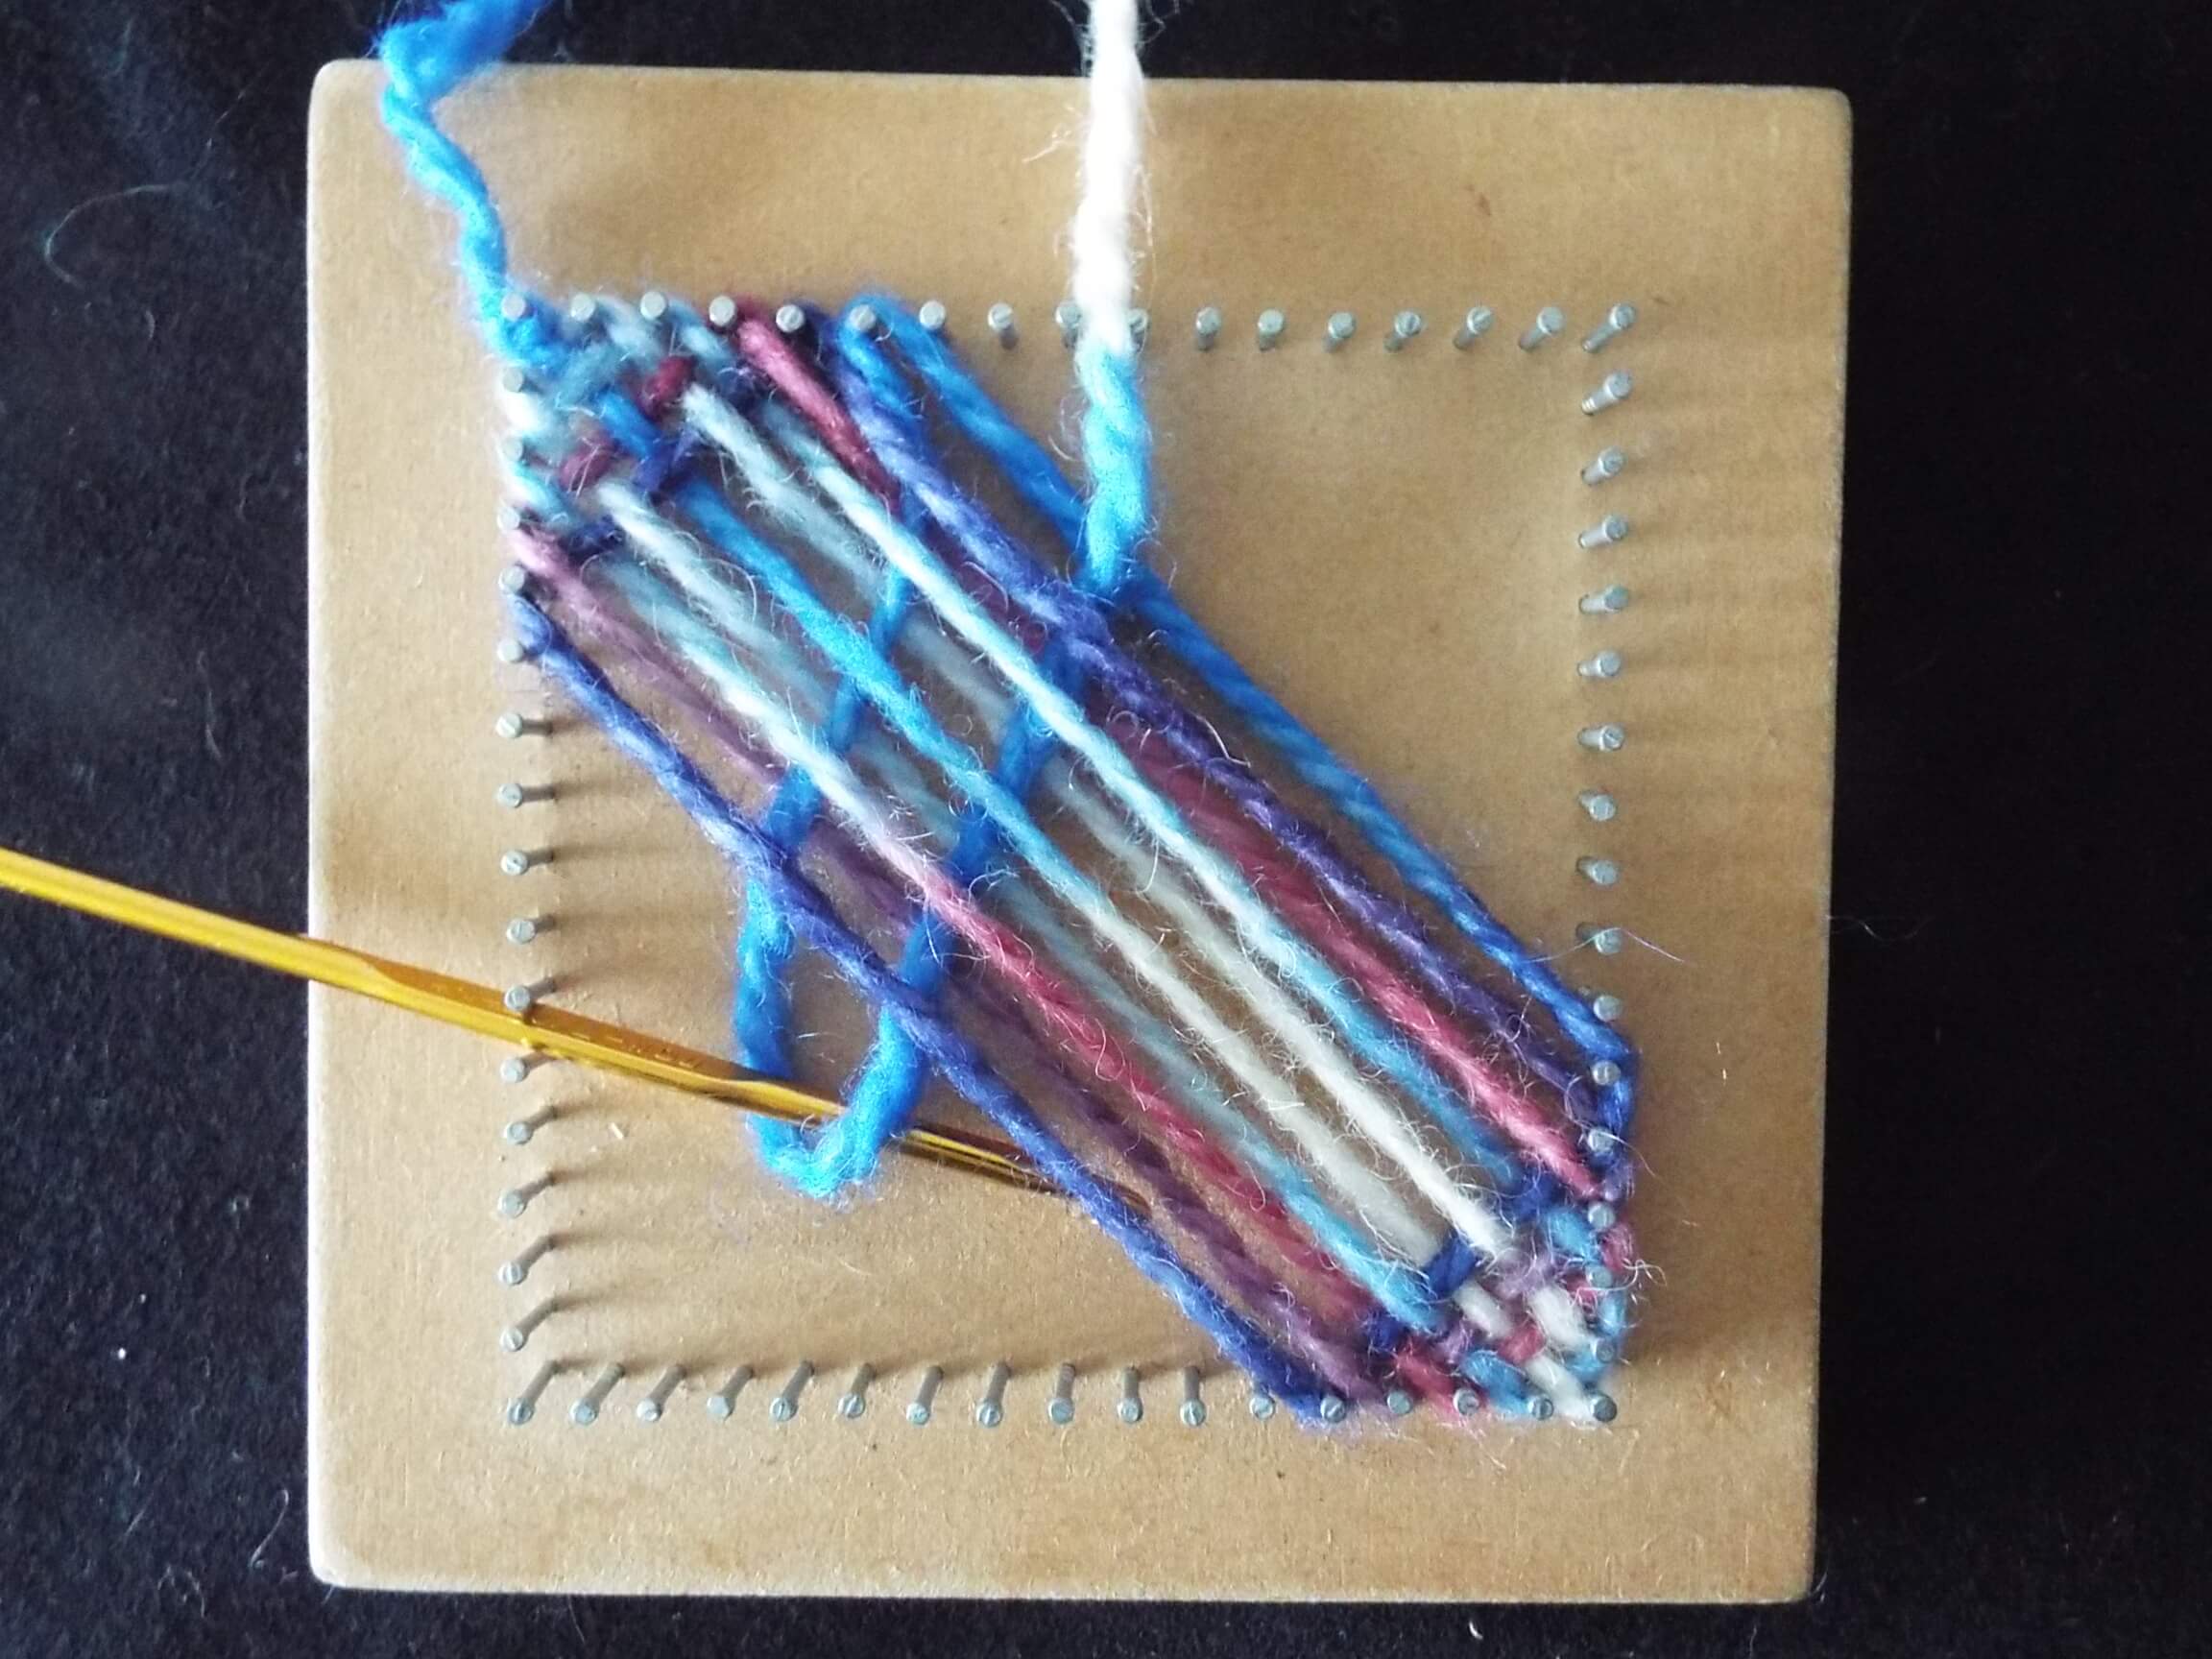 7. Pull yarn loop under several diagonal threads at the same time using a crochet hook to speed the weaving process.
 8. Place yarn loop around appropriate nails and pull firm, remembering to press the threads into straight lines between the nails. If weaving with thicker yarns, this is particularly important, as it can be very much harder to do once the weaving has progressed past half way.
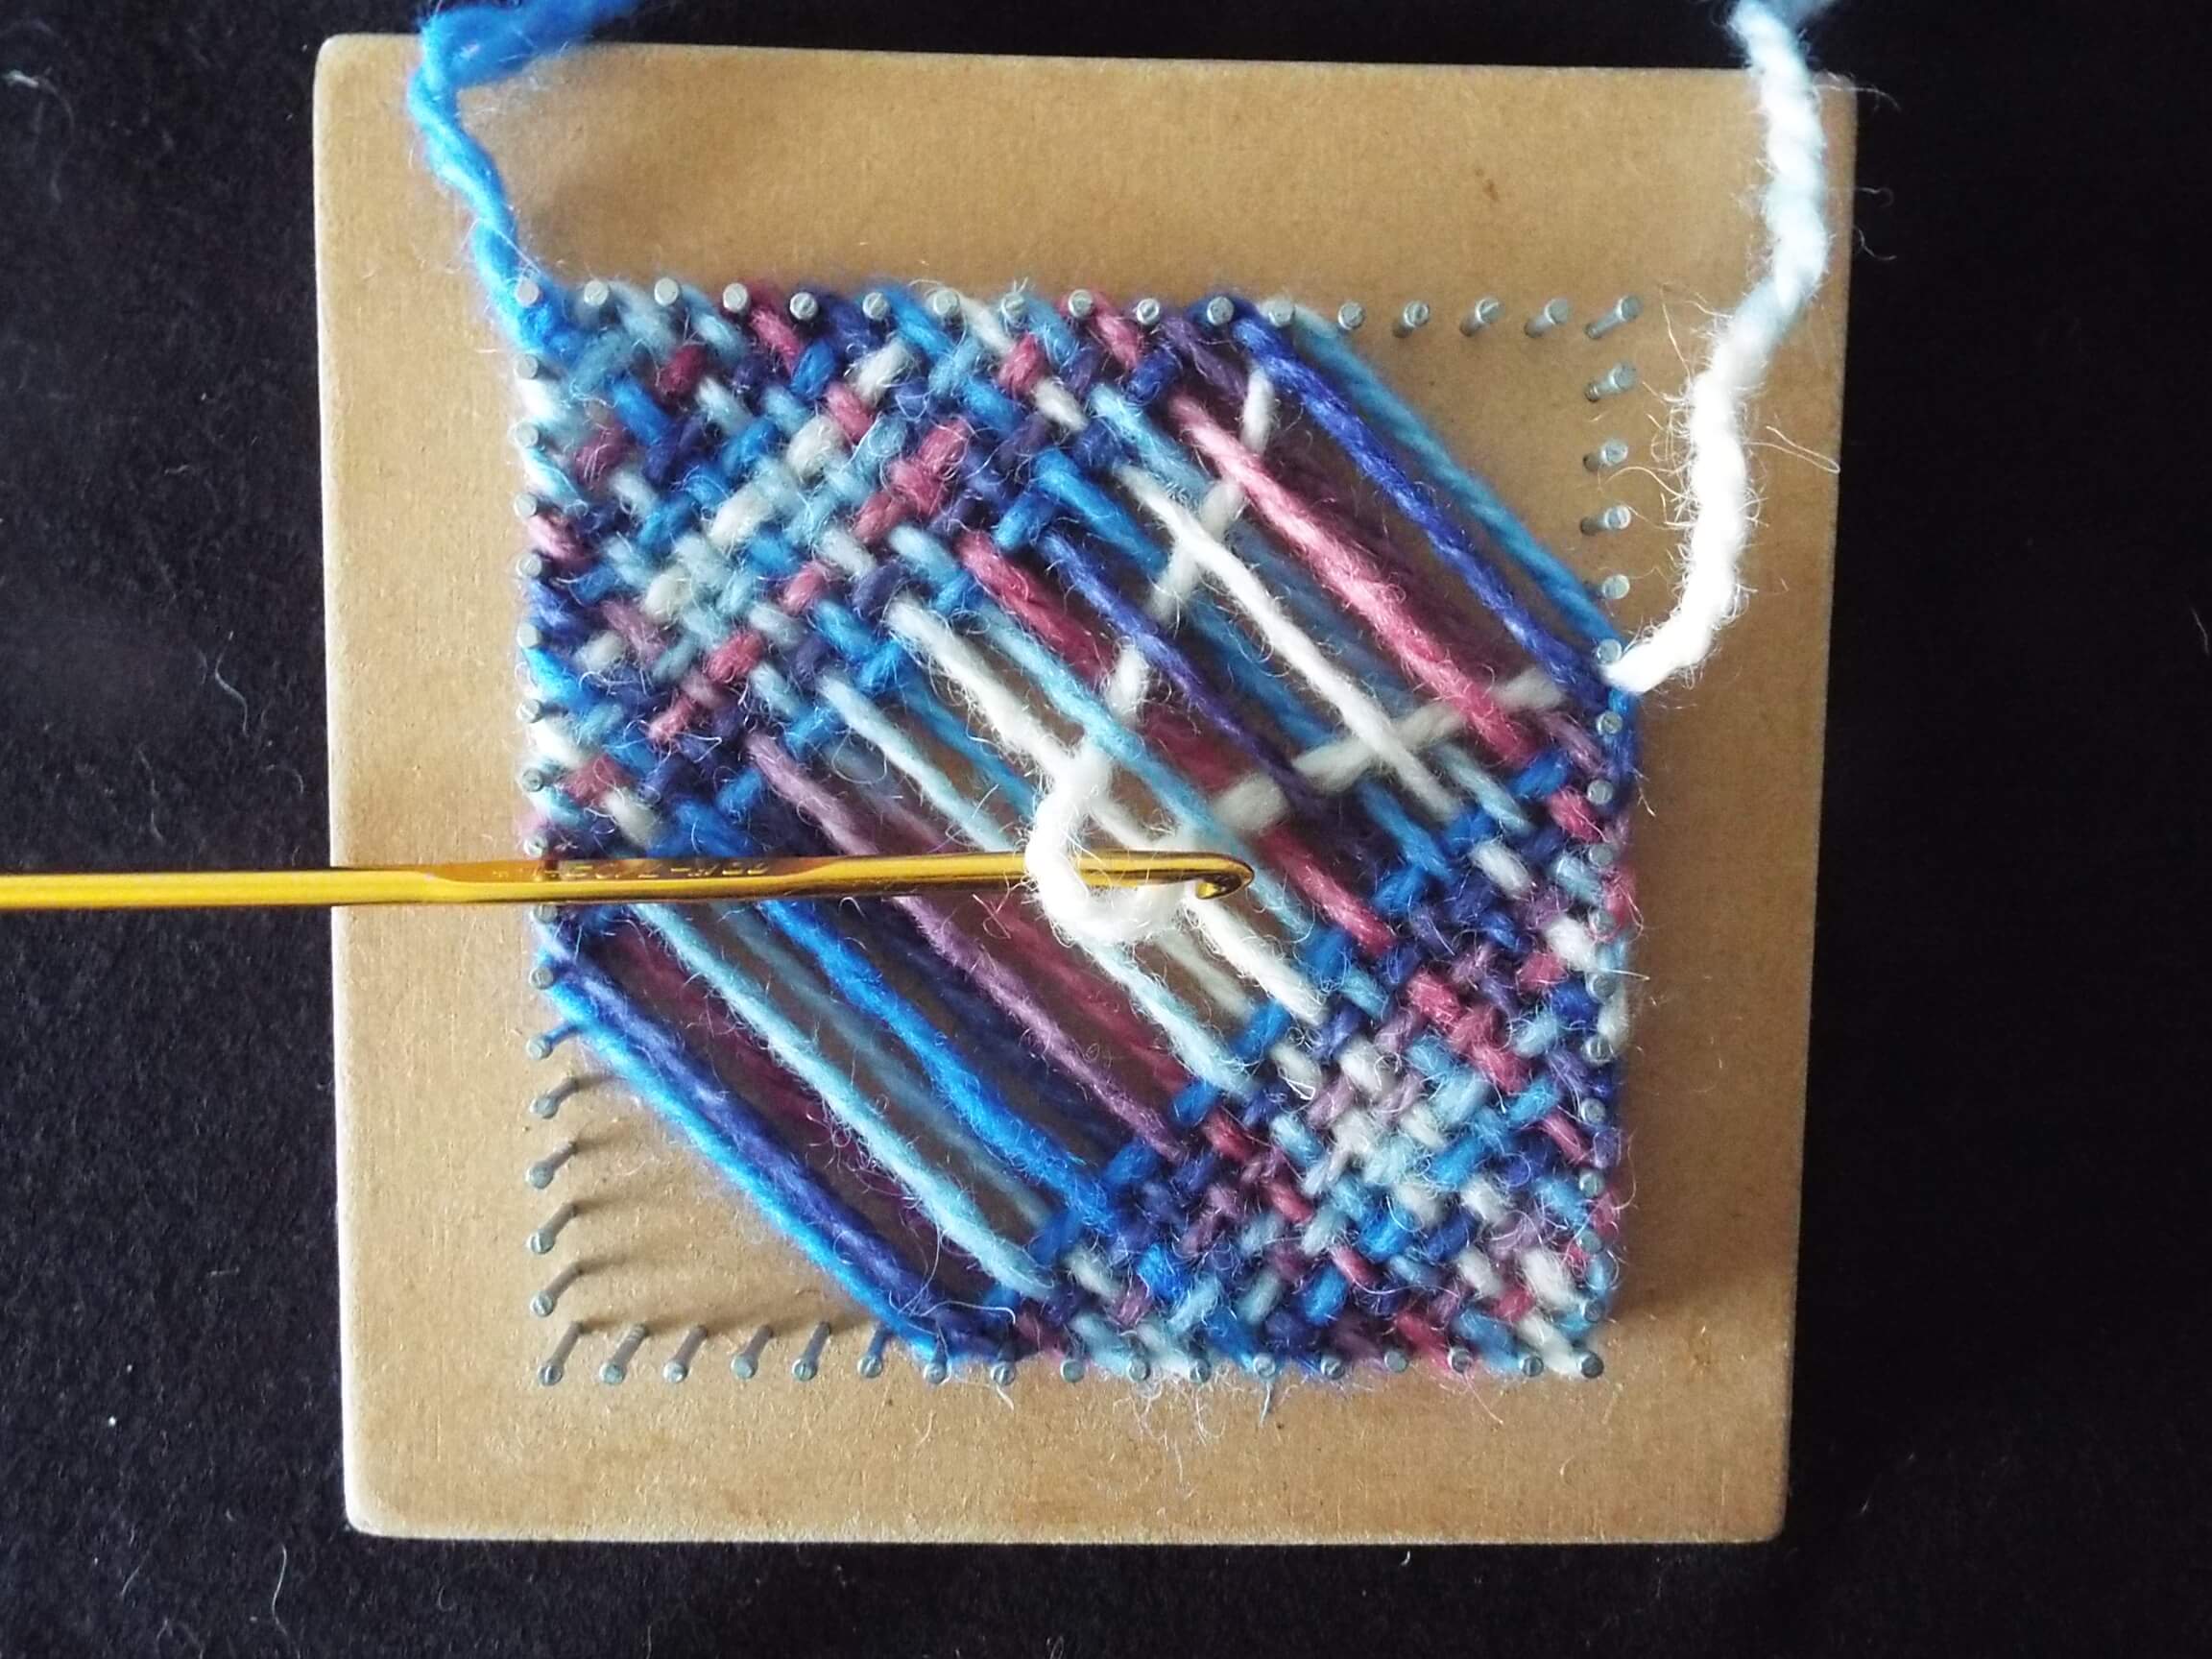 9. As weaving progresses, it can become difficult to weave loops in one go, so insert the crochet hook part way through the path of the loop, and pull through approximately the full size loop, then insert the crochet hook further across the work to finish the weaving the whole loop. Some people like to use a hook with a long shaft so the loop can be woven in one go, but I find the staged process easier.
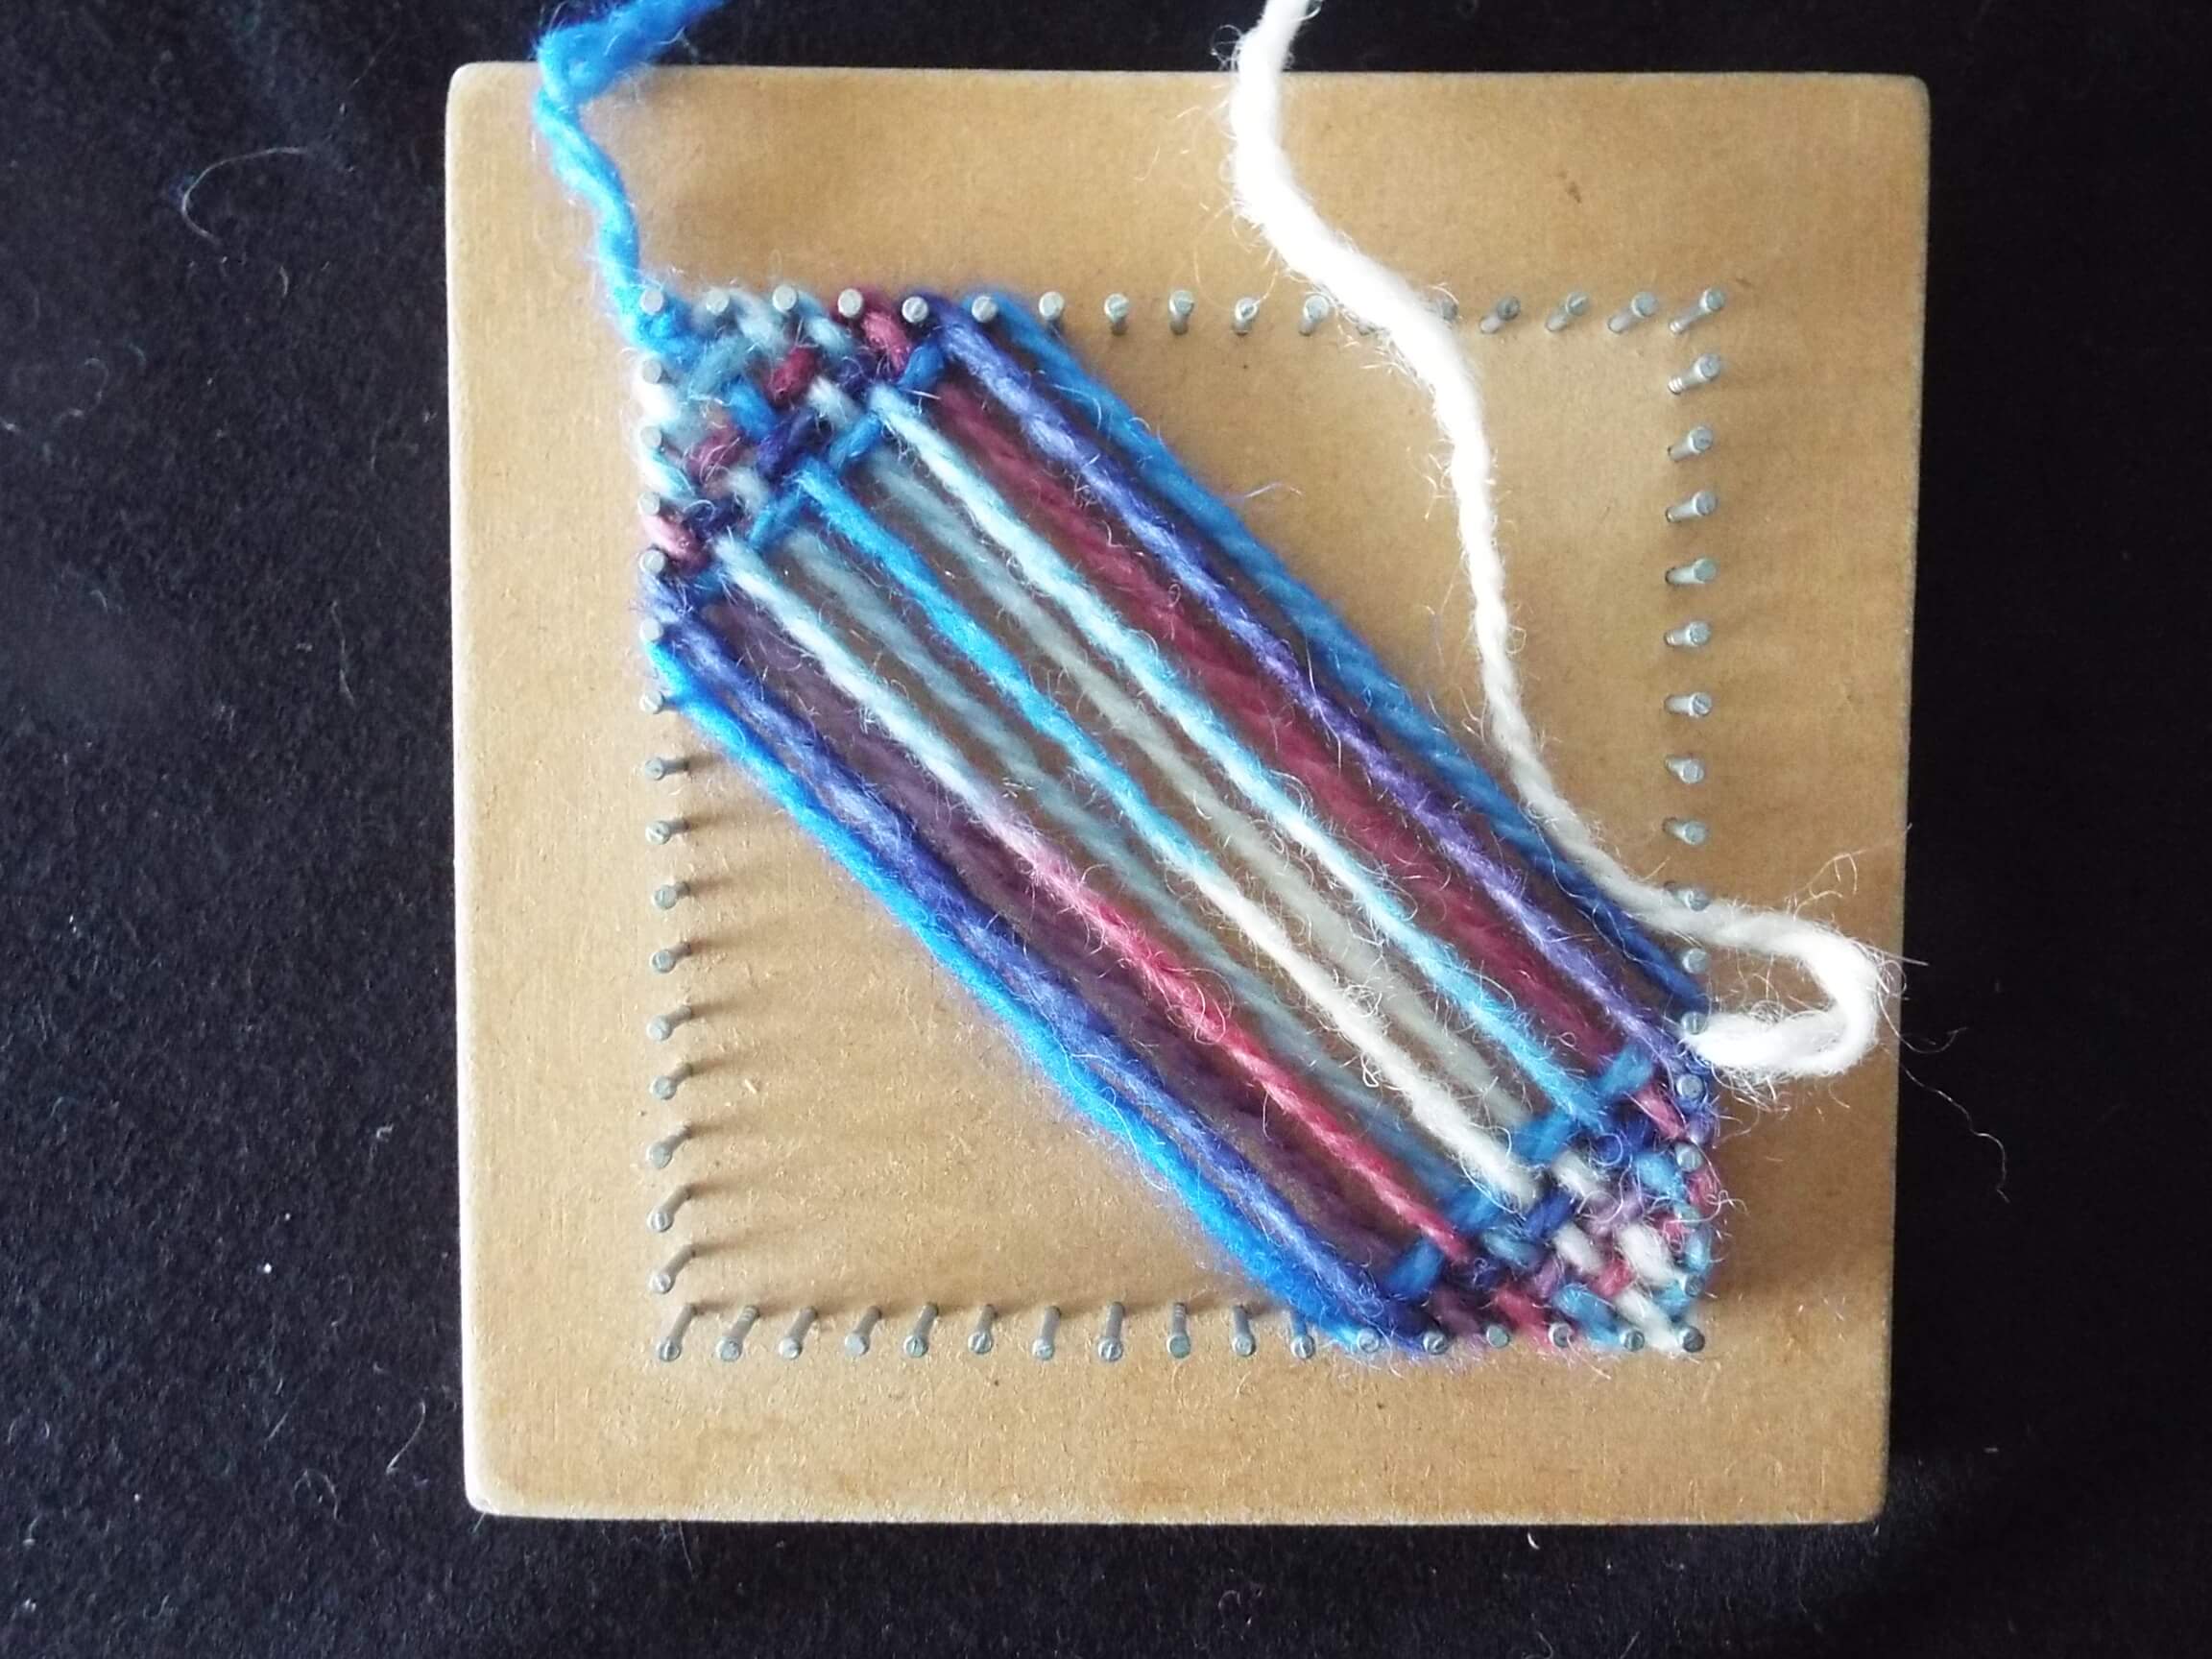
10. Continue weaving until there are only two, diagonally opposite, nails left unused.
Lay the yarn diagonally across the board and add about 4 cm for a tail. Cut the yarn at that point.
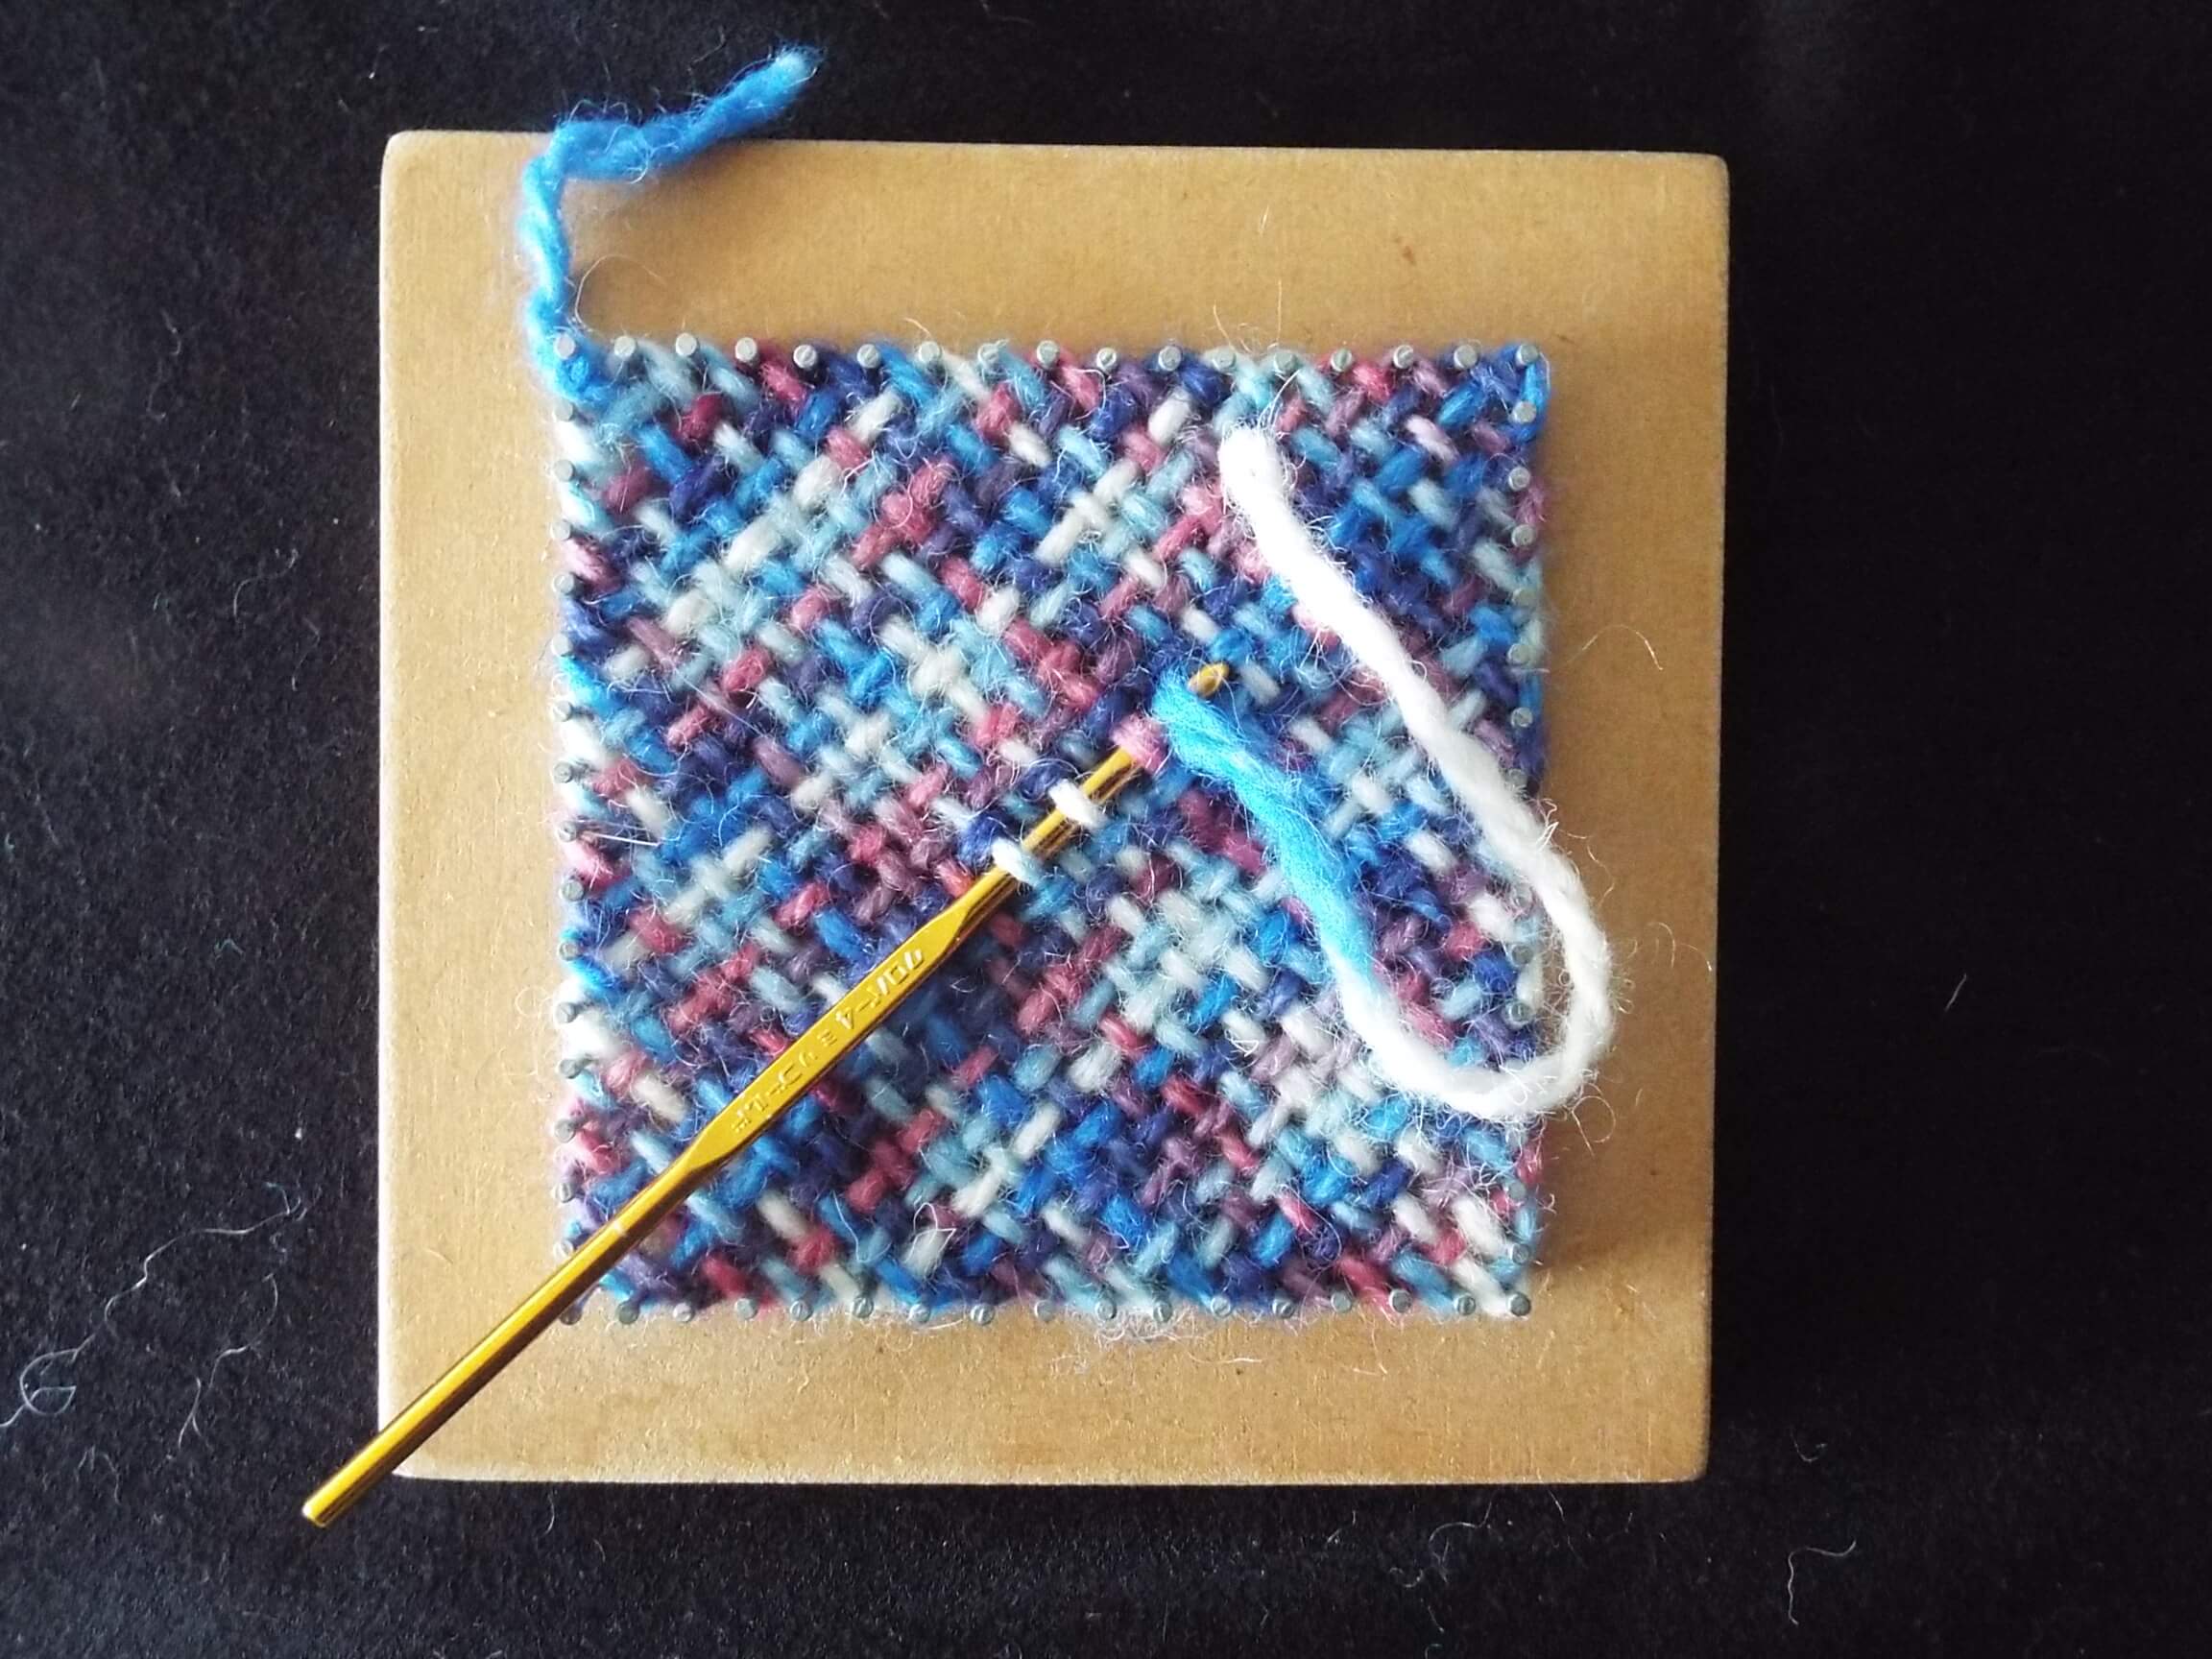 11. Weave the final diagonal thread – not a loop – which will probably need to be done in several stages. The final thread may be harder to weave than previous loops, and if so use the crochet hook to weave under every alternate threat one at a time.
 12. The final diagonal thread locks all the other loops in place, and completes the weaving of the square.
Untie the knot at the start of the weaving so the weaving can be easily lifted off the board using the method in step 13.

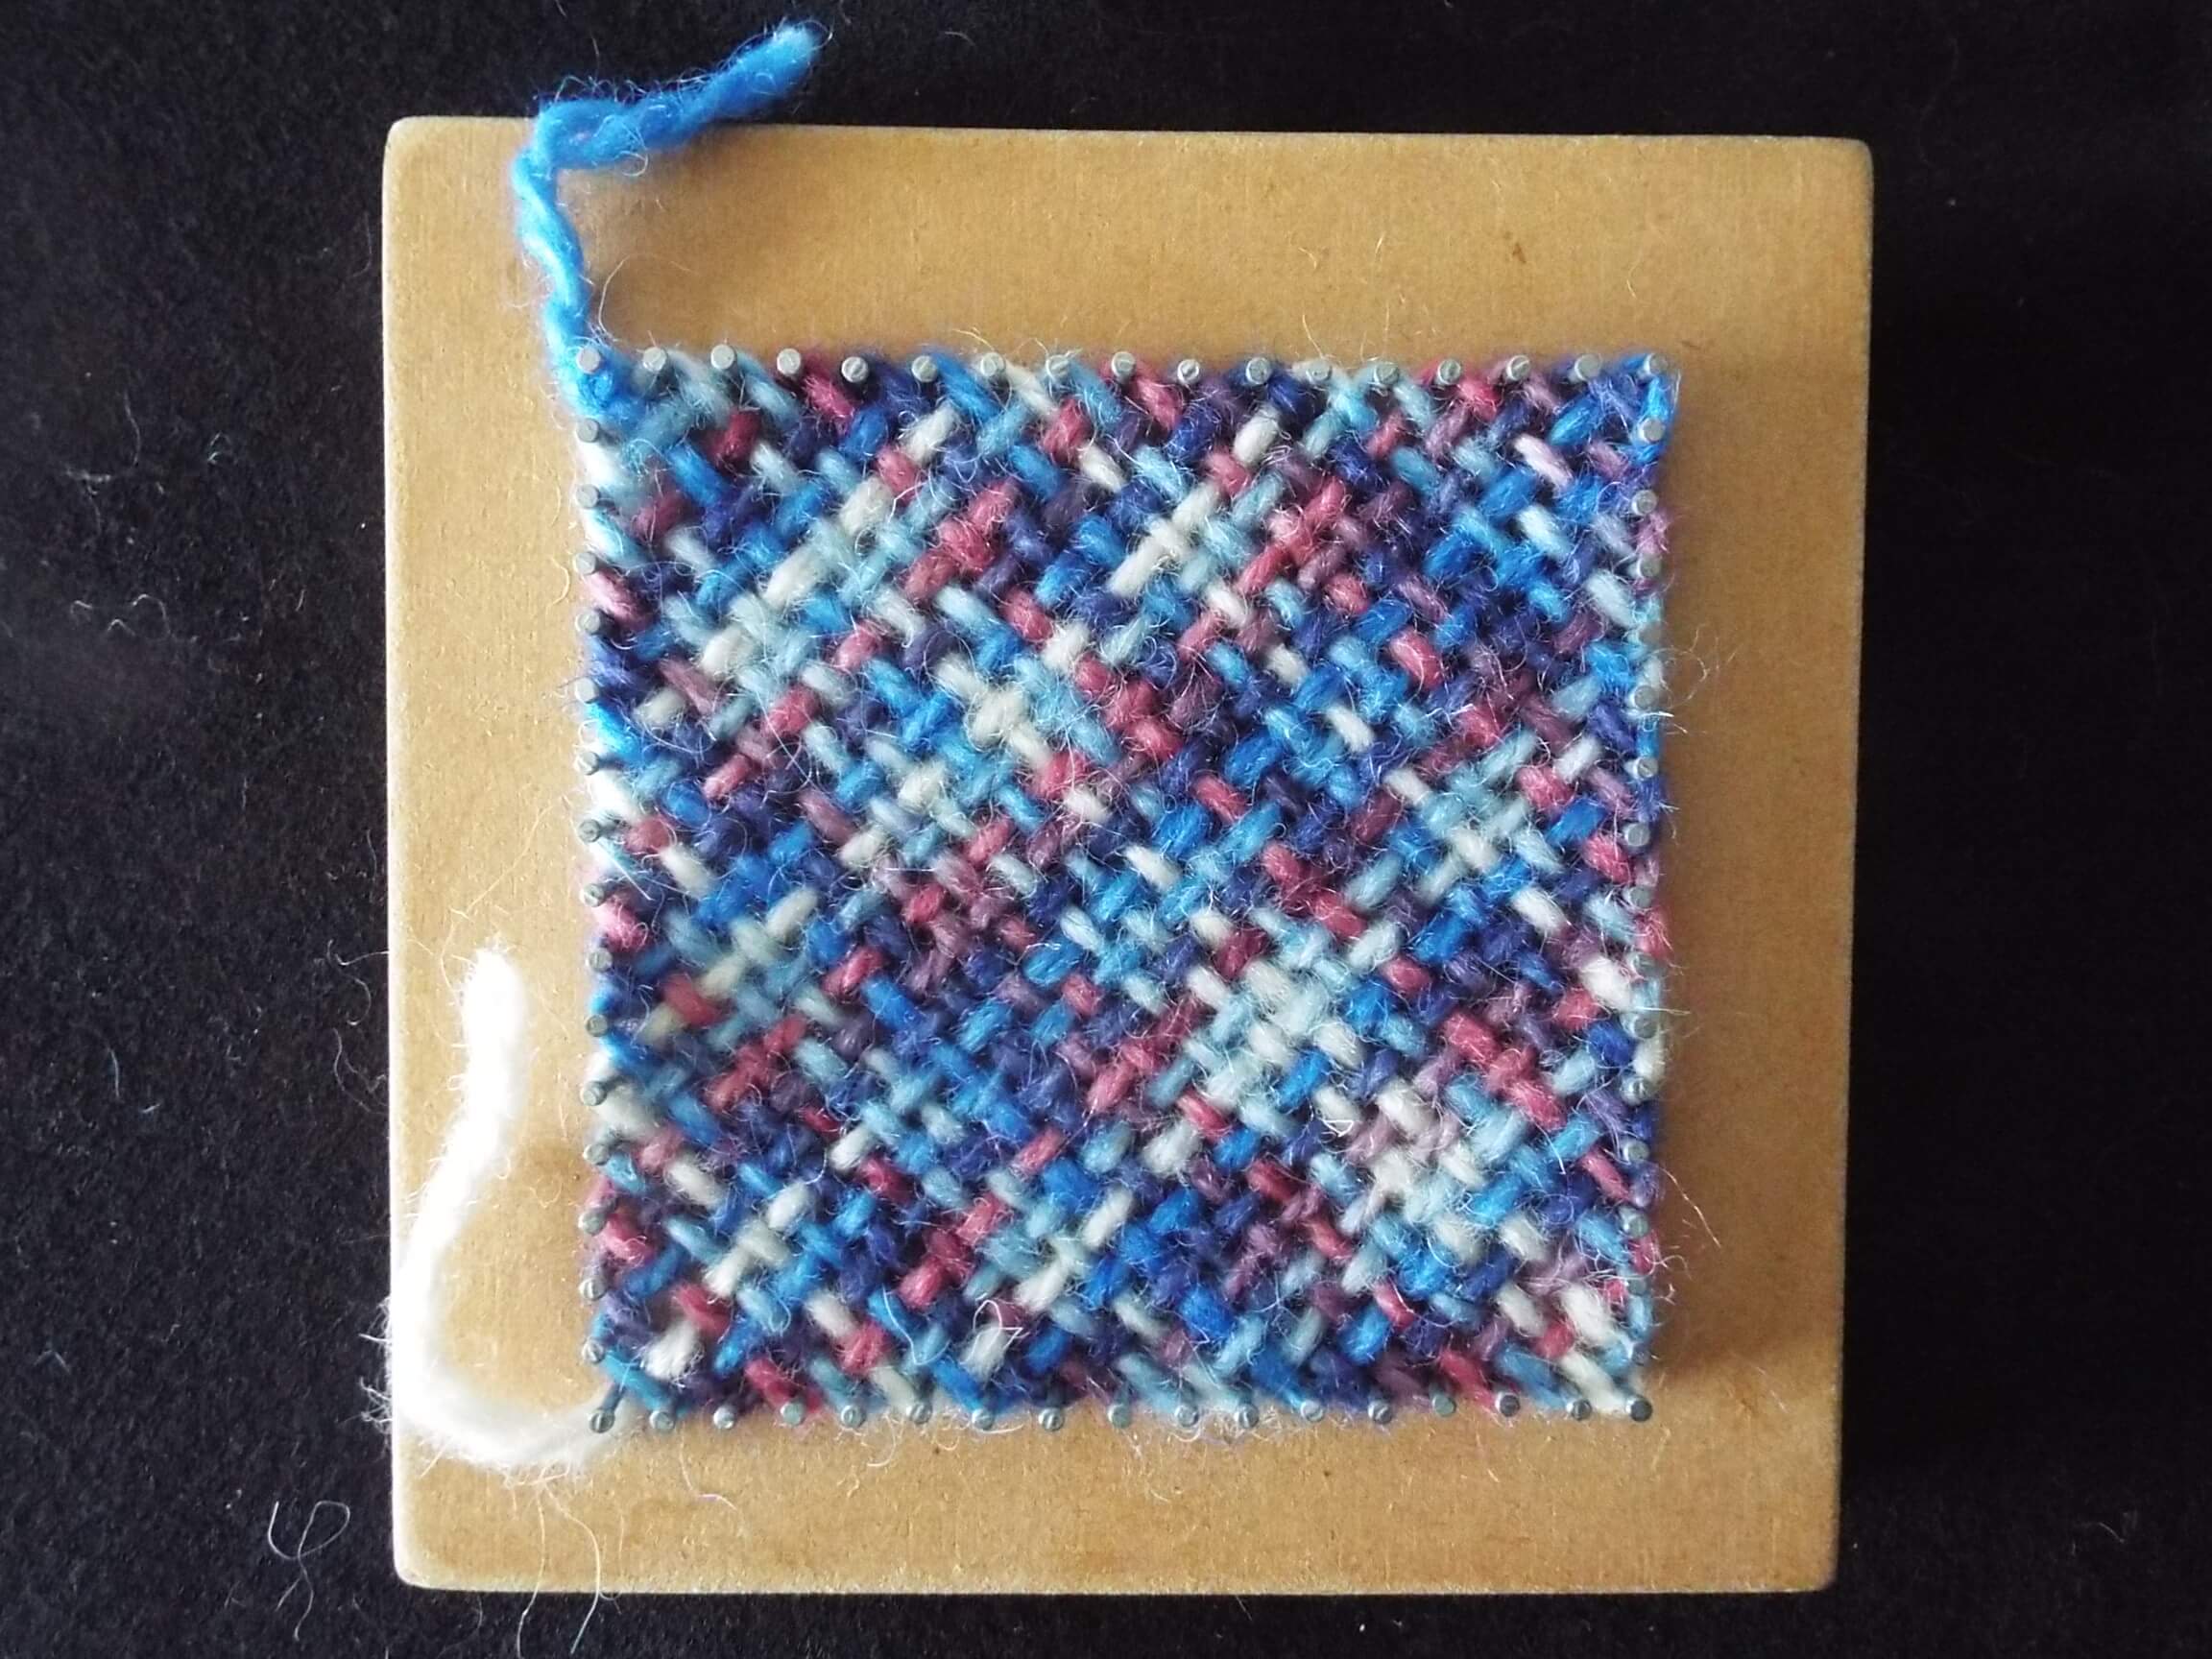
 14. The weaving has four finished edges, and a starting and finishing tail of yarn.
Use the crochet hook to weave in the yarn ends.
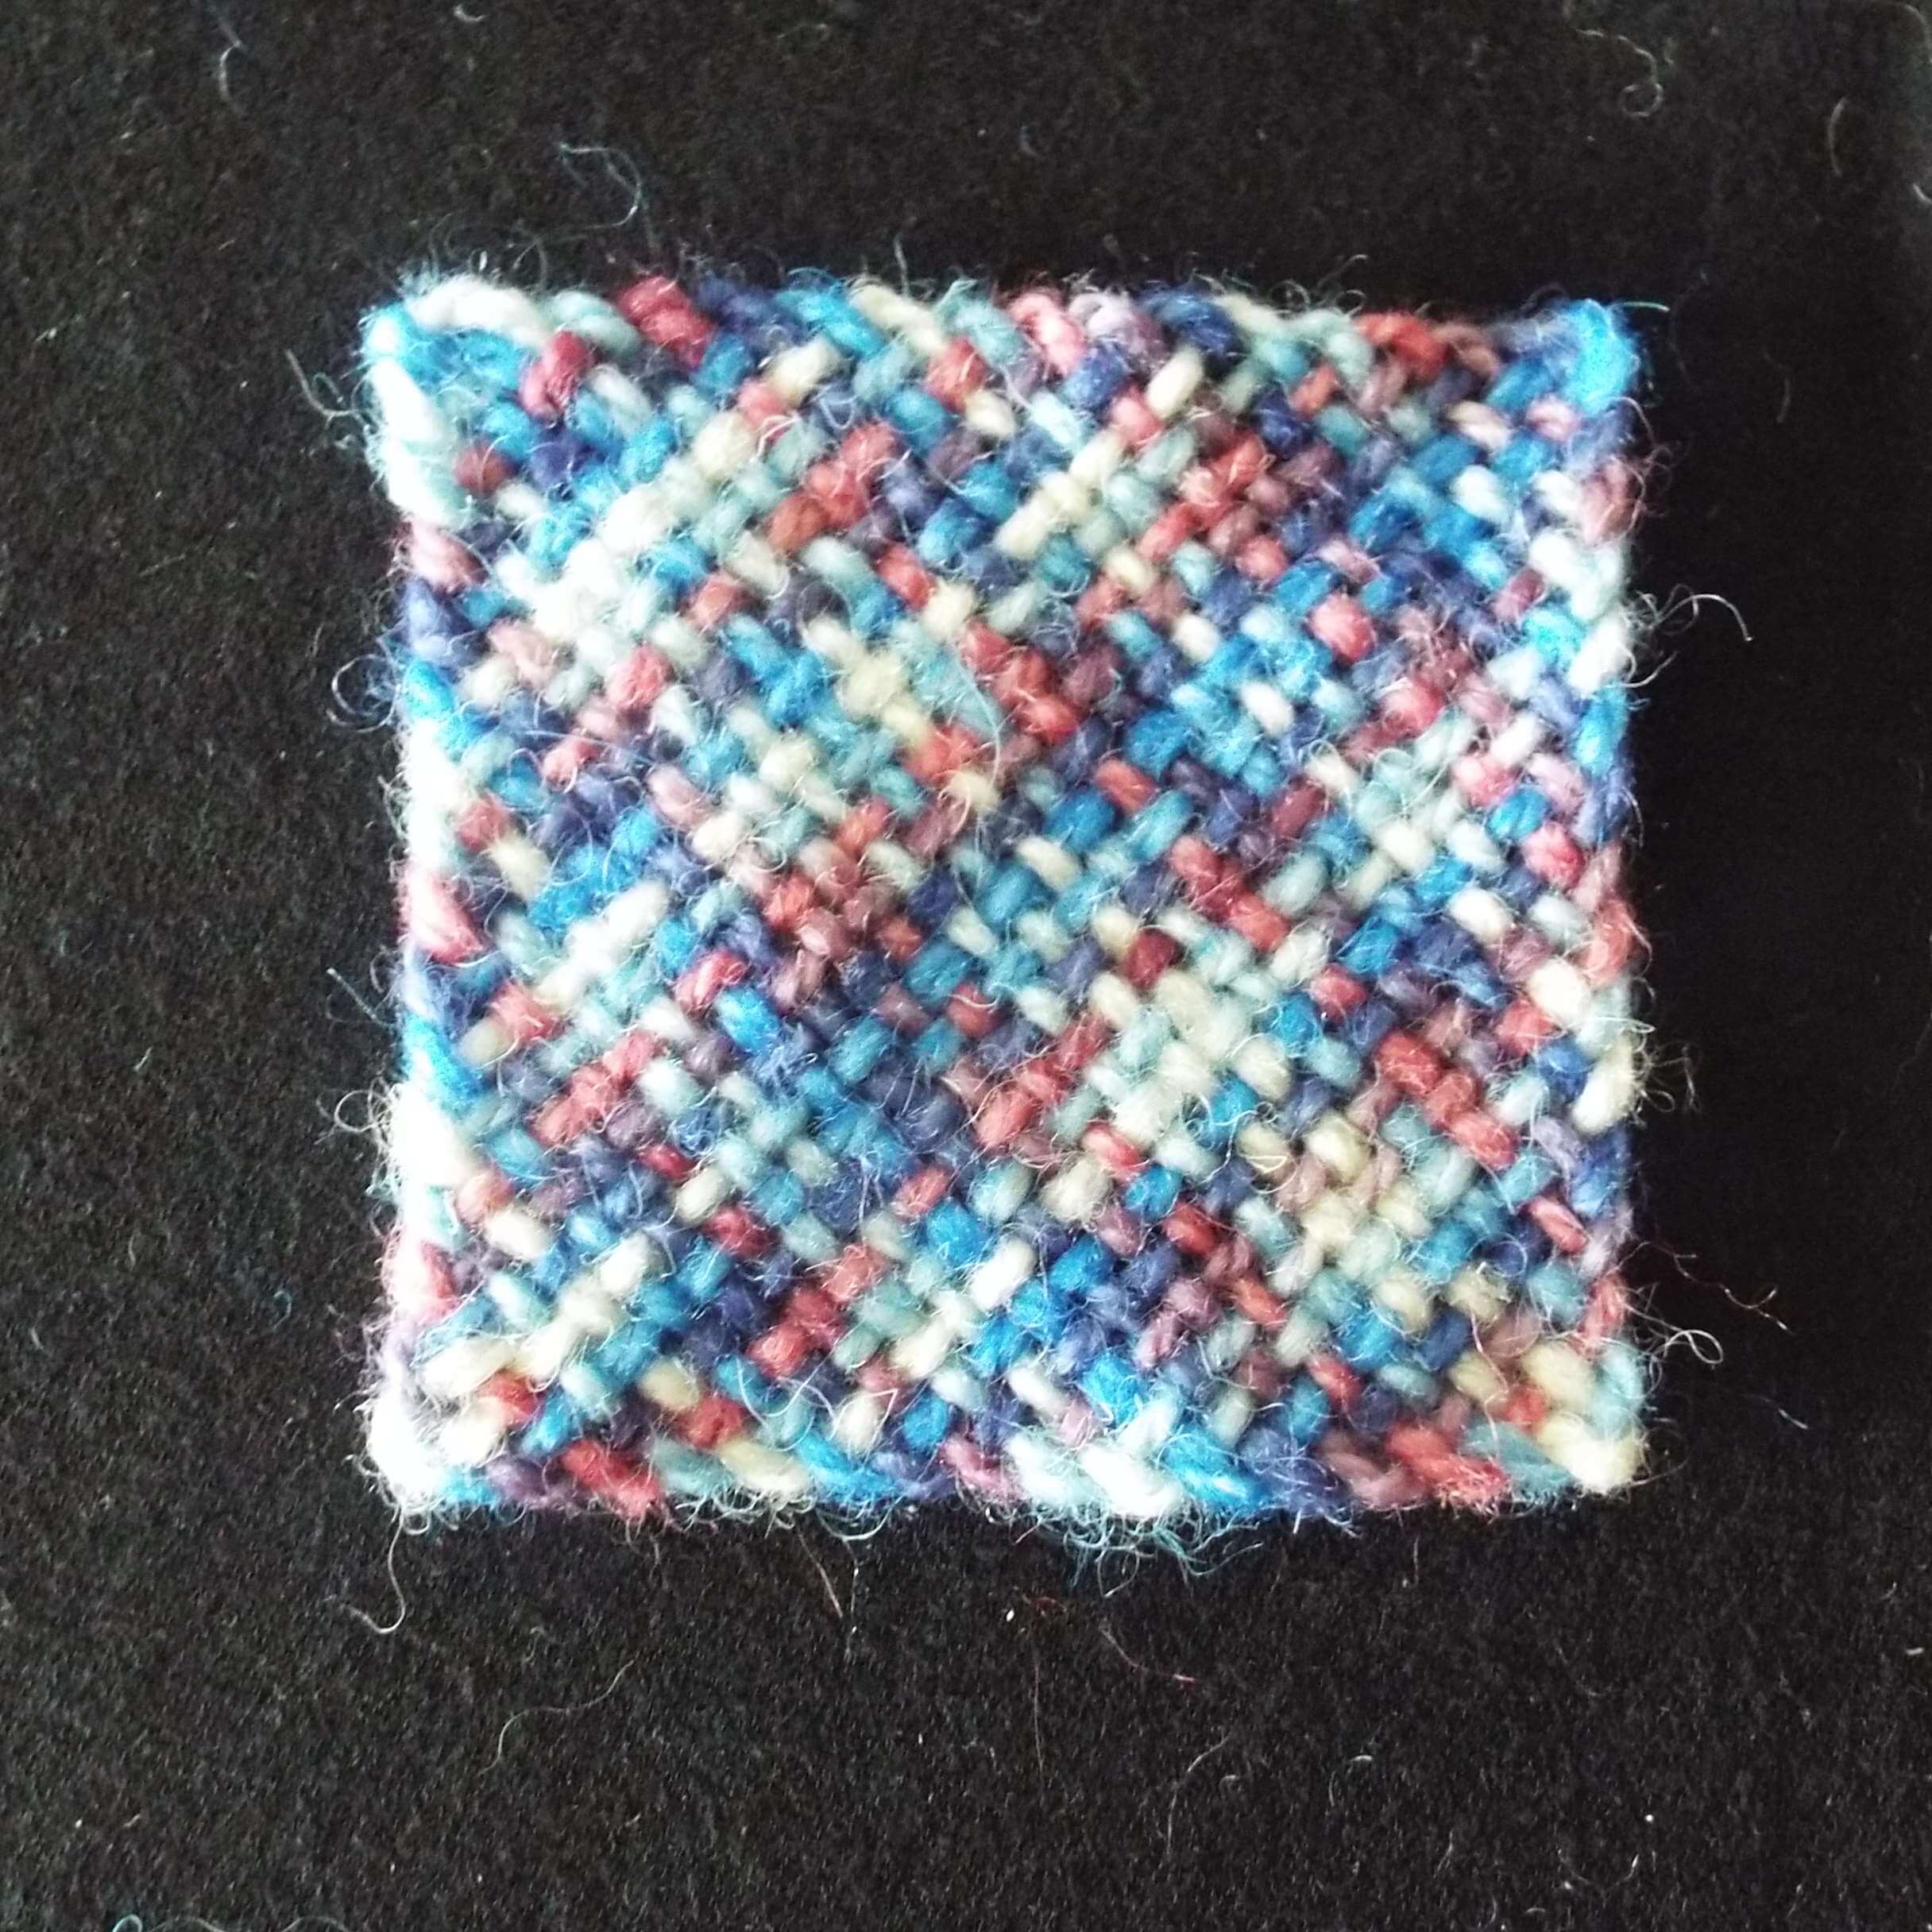 15. The finished diagonally woven square.
Use as a mat or join squares to make a larger piece of fabric.
Anne Grassham
Fleecewood
anne@woolcraft.co.nz
www.woolcraft.co.nz
www.woolcraftworkshops.co.nz
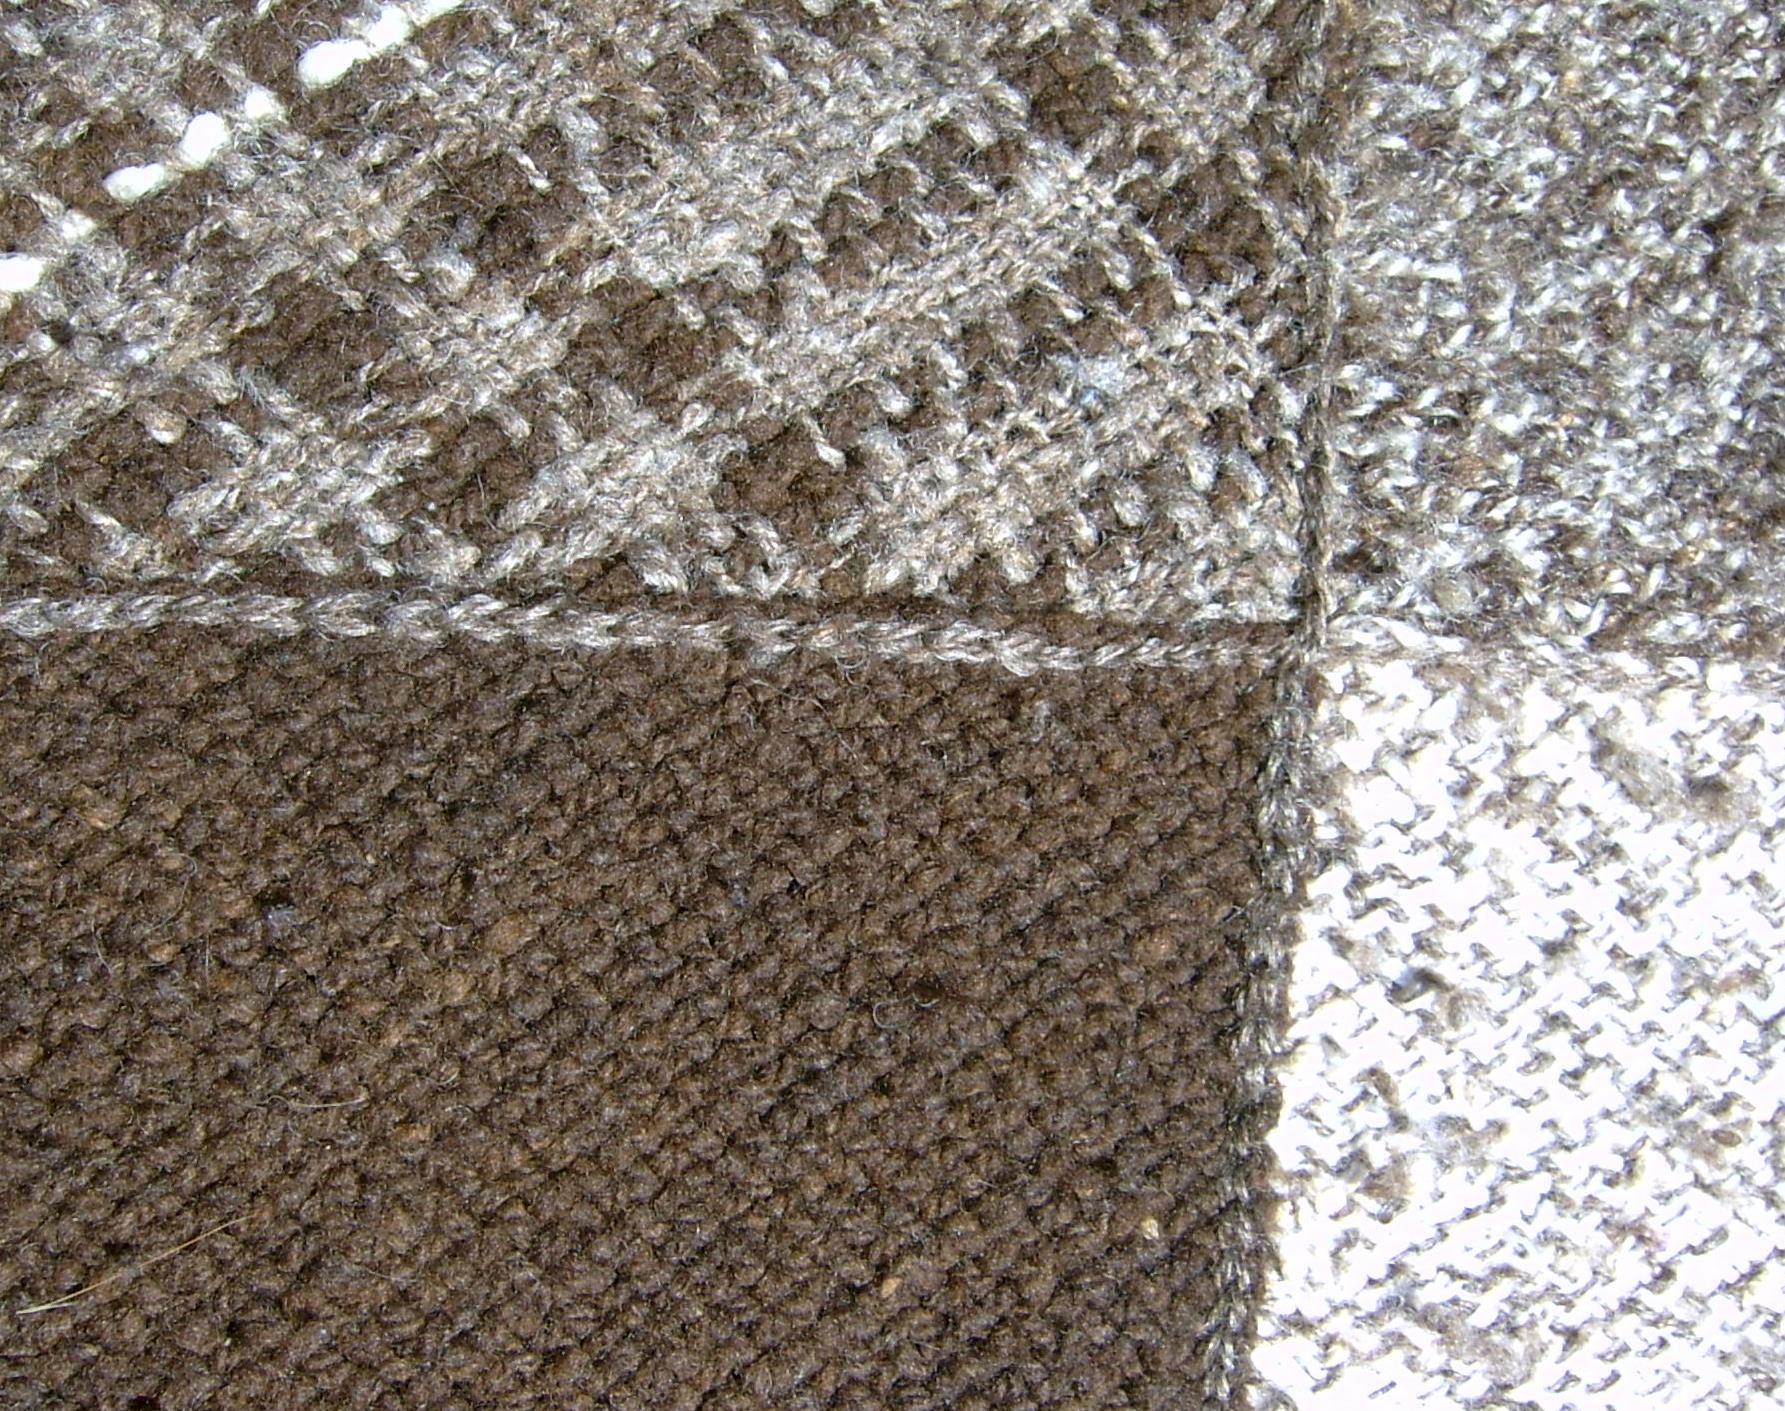
Traditionally, knitted and woven piggy squares have either been sewn together directly, or crocheted around to form a contrasting border before being sewn together. The unique structure of diagonally woven squares offers another, and much simpler way to join squares, by using the loops that form the selvedge along each woven edge, and chain crocheting them together. Using a contrasting coloured yarn for the chain crochet helps outline each square and adds a uniting element to the finished work. The crocheted join is a chain on the top side and a single line of stitches on the lower side. Placing the chain on the upper side gives a more pronounced outlining effect.
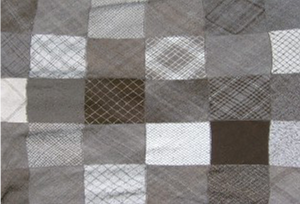
1. Lay out the squares in the desired pattern, so you know where each square is to be placed in the overall design. I like to intersperse plain and patterned squares, and try to balance colour intensities.
2. Looking at the first row of squares, pick up the first two squares to be joined. Slightly overlap the loops along the join edges. It may help to pin the join, but realise that this is an overlap join, not a seam.
3. Insert the crochet hook through the loop at one end of the top square, and the corresponding loop in the underlying, bottom square. Using the joining yarn, pull a loop up through both squares and without taking the crochet hook out of the loop, continue to chain crochet by inserting the hook into the next upper and lower loop along the square edges to be joined. Continue to chain crochet the squares together, until the squares are joined along one edge. Leave a generous yarn tail and break the yarn.
4. Join the next squares along the row in a similar fashion, until you have a line of joined squares, with yarn tails hanging off the inside (relative to the blanket/rug) edge.
5. You can either proceed by joining the other rows of squares in a similar way, until all squares are joined into rows, and then join the rows together, OR
6. You can join the second row of squares using the tails from the first row. The second row is thus attached to the first row in a flimsy way (until you come back and chain crochet the two rows together). When the tail yarn runs out simply add in the joining yarn by overlapping both yarns for approximately three chain stitches. In this method the joins are interspersed and there is no weaving in of ends needed later, but it is a bit more challenging managing all the partially attached pieces. Once all the squares have been crocheted together in one direction, you then chain crochet the squares together in the other direction.
7. Once the squares are all joined together in both directions, I chain crochet around the outside of the blanket/rug to firm up the outer edges, which are inclined to stretch otherwise.
